REVIEW · MORNING
Oahu Sunrise Tour From Waikiki
Book on Viator →Operated by Blue Hawaii Photo Tours · Bookable on Viator
Sunrise photography starts before your coffee. This half-day Oahu sunrise photo tour from Waikiki turns pre-dawn light into a hands-on workshop, with guided stops for framing, shutter speed, and real island views.
I love how small-group attention changes the whole feel of the morning. You’re not just tagging along in a van; you’re learning while you’re seeing the ocean and horizon light change fast. After the sunrise, you’ll keep shooting across the east side of Oahu with a pro guide calling out practical techniques.
My favorite part is the mix of structure and flexibility: you get taught basics that actually match what’s in front of you. The only drawback to plan for is the early start and the fact that you must bring your own camera (and be ready for hands-on instruction in the field).
In This Review
- Key highlights you’ll feel right away
- Why this sunrise photo tour is more than just watching dawn
- The van-to-dawn rhythm: Waikiki pickup and that pre-sun start
- Stop 1 at dawn: horizon light, waves, and tide-pool shots
- After sunrise: a quick breakfast and the 5–6 stop east Oahu photo route
- Your camera gear and what to expect if you’re a beginner
- What the tripod adds (and how to actually use it)
- Price and value: is $100 a fair deal?
- Weather and comfort: what to wear before 5 a.m.
- Who should book this sunrise photography tour?
- Should you book the Oahu Sunrise Tour from Waikiki?
- FAQ
- How long is the Oahu Sunrise Photo Tour?
- Does the tour include hotel pickup from Waikiki?
- Is a tripod provided?
- Do I need to bring my own camera?
- Is breakfast included?
- How many people are in a group?
- What is the cancellation policy?
Key highlights you’ll feel right away

- Small group size: max 7 per booking for more personal coaching
- Tripod included: you get hands-on stabilization for sharper dawn shots
- Guided sunrise timing: pickup leaves about an hour before sunrise, then you shoot at dawn
- Real learning in real light: framing, shutter speed, and focal points taught on location
- East Oahu photo route: 5–6 stops after a quick breakfast break
- Local photo guides: instruction from pros such as Evan, Marie, and Pattie, with individual help
Why this sunrise photo tour is more than just watching dawn
Oahu’s sunrise is pretty, sure. But what makes this tour worth it is that you show up with a plan for how to capture it. The whole experience is built around one simple idea: light changes every minute. So instead of spending the morning hoping you’ll get lucky, you learn how to work with the conditions as they happen.
You start from Waikiki with hotel pickup in a spacious, air-conditioned van. Then you head out before the sun comes up, which means you’re already in position when the sky begins to brighten. That timing matters for two reasons: the colors are different at each stage of dawn, and the ocean movement gives you those dramatic splashes and tide-pool reflections that look great on camera when you understand what to set.
The group size also helps. With up to 7 people per booking, you get more attention than the big-bus style tours. And the guides vary by experience level. If you’re a beginner, you’ll be guided step-by-step. If you’re more advanced, you’ll still get practical tweaks that help you shoot cleaner and sharper.
One more value point: the tour gives you tripod use. If you’ve ever tried to shoot sunrise handheld, you know it’s hard to get crisp results. The tripod turns those low-light minutes into a usable window instead of a blurry gamble.
You can also read our reviews of more tours and experiences in Oahu


The van-to-dawn rhythm: Waikiki pickup and that pre-sun start
You’re meeting at Ala Moana Honolulu by Mantra at 410 Atkinson Dr, and from there the tour runs with round-trip hotel transport from Waikiki. If you’re staying in Waikiki, it’s one less headache before a very early morning.
The tour departs about an hour before sunrise. That means you aren’t just leaving at some random time—you’re leaving when you need to be on the east side with enough daylight to set up, frame, and then keep shooting as the sky shifts.
This rhythm matters. Dawn photography isn’t one moment. It’s a sequence:
- the sky starts changing first
- then the horizon lights up
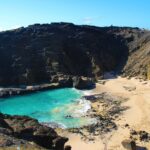
- then the ocean detail and tide pools become easier to see and shoot
You’ll also appreciate the van ride because it’s air-conditioned and comfortable. It’s not a marathon hike; it’s a photography workshop in motion. You can keep your energy for the moments when you’ll actually be shooting.
If you’re booking during a busy season, note that this tour is often reserved around 42 days in advance. Sunrise is popular for a reason, so booking early helps you lock in dates.
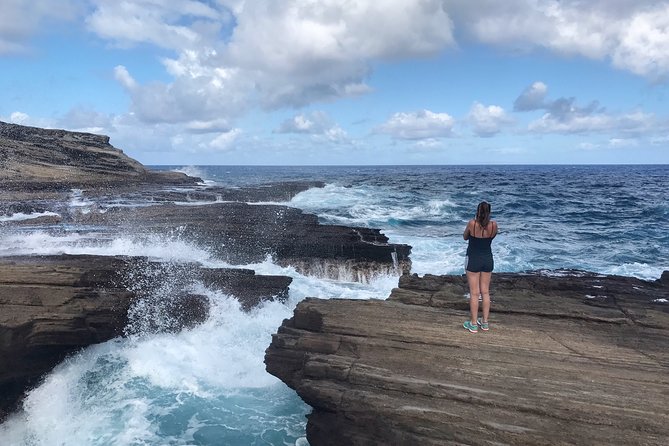
Stop 1 at dawn: horizon light, waves, and tide-pool shots
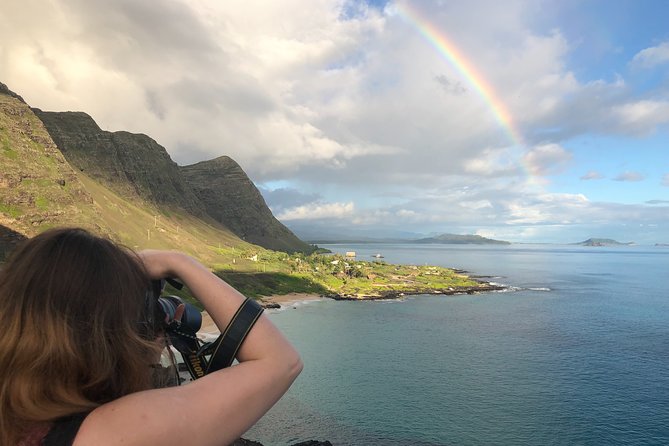
The first major moment is a drive to a beach location where you’ll get a sweeping view of the sun appearing on the horizon. The tour is designed so you’re there before the sun crests—so you can shoot the sky as it transitions from dark to bright.
This stop is where the lessons start to become real.
You’ll get tips on things like:
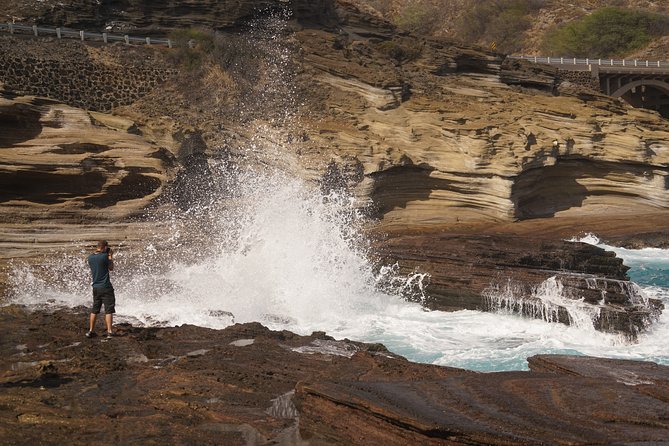
- framing (what to include and what to cut)
- shutter speed (how to freeze splashes or soften water)
- focal points (so your image has a clear subject, not just a pretty background)
You’ll also see the difference between just pointing your camera and actually composing. With sunrise, the sky can take over your frame fast. Guides help you decide what matters most: the sun itself, the reflection, the waves, or the textures in tide pools.
Practical note: bring your patience. You’ll likely do a few test shots, adjust settings, and wait for tiny changes in the water. That’s normal. Sunrise isn’t a static subject. It’s moving light, moving water, and moving clouds if you get them.
After sunrise: a quick breakfast and the 5–6 stop east Oahu photo route
Once the sun is up and you’ve got your dawn images, the tour takes a short breakfast break. The catch: food and drinks aren’t included. So use this stop to refuel, but plan to cover your own breakfast. (It’s still a useful break that keeps the morning productive instead of dragging you through on empty.)
Then comes the heart of the workshop: multiple photography locations around the east side of Oahu. You’ll visit about 5–6 different stops, which is a big deal if you’re hoping for variety without spending the whole day driving yourself.
What I like about this portion is that it’s not just scenic stops. It’s tied to learning. Each new location gives you fresh scenarios:
- different lighting angles
- different horizons and ocean textures
- new opportunities for composition
The tour keeps returning to the same core skills—light and framing—because those don’t change with the scenery. The guide can help you apply what you learned in Stop 1 to each new viewpoint.
In the field, guides may also take time to understand what you’re using and what you want to shoot. Some guides are particularly focused on personal instruction, including coaching individuals on the spot and helping them get set up with the tripod and best settings for the conditions.
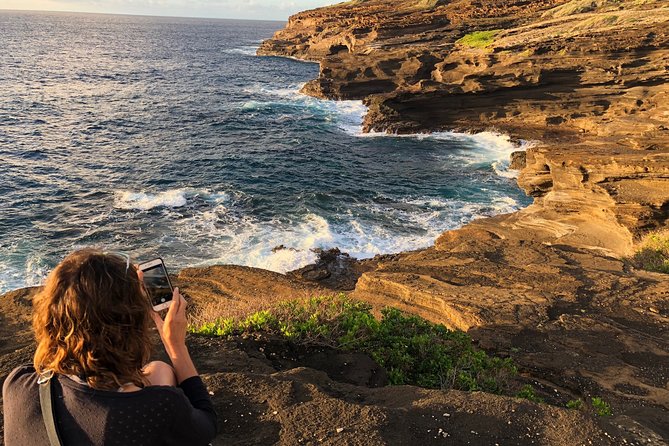
Your camera gear and what to expect if you’re a beginner
This is a photography tour with a simple rule: you bring your own camera. The tour doesn’t provide cameras—only support gear like tripods—so show up ready to shoot.
That sounds obvious, but it’s the difference between feeling included and feeling frustrated. If your device can’t take manual controls (or you don’t know how to use them), you may still learn composition and timing. But you’ll get more from the shutter-speed and framing lessons if you can access those controls on your camera or phone.
From the style of coaching described by past participants, the best results come when you:
- ask questions early
- admit what you don’t know yet
- take a few minutes to adjust settings when the guide says it’s time
Guides such as Evan, Marie, and Pattie are described as helpful with tailored guidance. Some participants noted that guides took photos of them during stops—handy if you also want a few personal shots, not just ocean images.
If you’re more advanced, you’ll probably enjoy how the guide explains settings in a way that ties back to what you’re seeing: brighter sky vs darker foreground, water motion vs sharp detail, and how to keep your focal point clean.


What the tripod adds (and how to actually use it)
Tripods sound like a giveaway detail, but they’re important here. Sunrise and low-light conditions often push you toward slower shutter speeds. That’s how you get dramatic ocean effects, but it also creates blur if you’re handheld.
With the tripod available, you can:
- steady your camera for sharper shots
- experiment with longer shutter speeds to control water texture
- keep composition consistent while the light changes
Here’s how I’d think about it: handheld is fast and flexible. Tripod is intentional. This tour leans into intentional—meaning you’ll likely do a few setups, then shoot multiple frames while the scene evolves.
Plan for this by arriving with your tripod ready to assemble quickly. If you’re not used to it, use the first dawn minutes to practice. Don’t wait until you’re already at the peak sunlight stage.
Price and value: is $100 a fair deal?
At $100 per person for a roughly 5-hour guided workshop, the price only makes sense if you’re getting what you came for: structured photo instruction plus access to prime dawn timing and multiple east-side stops.
Here’s what you’re paying for, in practical terms:
- hotel pickup and drop-off (so you’re not figuring out early transport)
- a professional guide with photo coaching
- tripod use
- multiple shooting locations that reduce your need to plan a full itinerary
If you tried to recreate this alone, you’d likely spend time figuring out sunrise viewing spots, plus the time cost of driving and parking. You might also miss the small adjustments that turn a pretty scene into a strong photo.
So the value is best for you if:
- you want more than snapshots
- you like learning photo fundamentals on location
- you prefer a guided route over an all-day DIY sunrise plan
It may feel less worth it if you just want casual sightseeing, especially if you’re not bringing a camera you can use effectively. One negative experience pointed out that the tour is a photo workshop, and expecting a non-instructional sunrise outing can lead to disappointment.
Weather and comfort: what to wear before 5 a.m.
The tour is designed to operate in all weather conditions, and that means you should dress like you’ll be outside for a while. Sunrise mornings can feel chilly even if Hawaii is warm later.
Wear comfortable, closed-toed walking shoes. Bring a hat and sunscreen. Even in the early hours, the sun can be sneaky. And keep a light layer handy if you run cold.
Also plan for uneven ground near beaches and viewpoints. This isn’t a sit-and-watch show. You’ll be moving, setting up, and walking between angles.
Who should book this sunrise photography tour?
This is a great fit if you:
- want a guided way to learn camera basics like shutter speed and framing
- are staying in Waikiki and want an easy pickup option
- enjoy shooting in small groups where you can get help in the moment
- want to see multiple east Oahu photo locations without driving a full route yourself
It’s also a good choice for mixed skill levels. The tour is described as suitable from beginner to advanced, and guides appear to adjust to the group rather than teaching one fixed level.
I’d think twice if you:
- want a long, casual beach day with lots of downtime
- aren’t planning to use a camera (or don’t want hands-on instruction)
- expect a one-on-one style photo shoot for every minute (group coaching is still group coaching)
Should you book the Oahu Sunrise Tour from Waikiki?
If you’re the type who wants sunrise photos that look intentional—not accidental—this is an easy yes. The combination of early timing, tripod support, and practical guidance on framing and shutter speed is exactly how you turn a pretty morning into real results.
Book it especially if you’re staying in Waikiki and you don’t want to solve sunrise logistics on your own. The small-group size is the secret sauce. It helps you learn faster, ask questions, and spend your attention where it matters: the scene in front of your lens.
If you’re mainly hoping for a relaxed viewing experience and you’re not ready to shoot, you might prefer a non-photo sunrise outing instead.
FAQ
How long is the Oahu Sunrise Photo Tour?
It runs for about 5 hours.
Does the tour include hotel pickup from Waikiki?
Yes. Round-trip transport and hotel pickup/drop-off are included.
Is a tripod provided?
Yes. The tour includes the use of tripods.
Do I need to bring my own camera?
Yes. You’re required to bring your own camera (the tour does not provide cameras).
Is breakfast included?
There’s a quick breakfast stop after sunrise, but food and drinks are not included in the tour price.
How many people are in a group?
A booking is limited to a maximum of 7 people, and the activity has a maximum traveler limit of 8.
What is the cancellation policy?
You can cancel for a full refund if you cancel at least 24 hours before the experience’s start time. If you cancel less than 24 hours before, the amount paid won’t be refunded. If canceled due to poor weather, you’ll be offered another date or a full refund.
—
If you tell me what camera you’re bringing (phone, compact, mirrorless, DSLR) and your comfort level, I can suggest how to set yourself up so the first sunrise frames come out sharp.