REVIEW · OAHU
Custom Private Multi Day Tours on the island of Oahu Hawaii
Book on Viator →Operated by Halia Tours and Transportation · Bookable on Viator
This Oahu tour lets you steer. You get a private multi-day plan with pickup and all transportation handled, so you can hop between south shore snorkeling, Diamond Head views, and Pearl Harbor without renting a car. It’s built for small groups who want one driver/guide to keep the day moving.
I like the way the guide (often Michael) handles real trip-planning, not just sightseeing. He’s known for making tough spots easier, including helping people up Diamond Head. I also like the flexibility baked into the schedule, with optional time at spots like the Byodo-in Temple, Waimea Valley waterfall walk, and North Shore stops that match the season.
The main trade-off: admissions and equipment rental fees aren’t included, and you’ll need to book USS Arizona Memorial tickets in advance. A couple of the most famous stops are conditional too (day-of-week options and parking-dependent viewpoints).
In This Review
- Key takeaways before you book
- Price and logistics: what $1,997.50 really buys you
- The guide factor: Michael’s style that keeps a trip stress-free
- Day 1: Hanauma Bay, shopping stops, Diamond Head, and a long day toward Pearl Harbor
- Hanauma Bay Nature Preserve (3 hours)
- Waikele Premium Outlets (1.5 hours)
- Aloha Stadium Swap Meet & Marketplace (optional by day)
- Diamond Head State Monument (about 1 hour)
- Halona Blowhole (15 minutes, optional)
- Nu’uanu Pali Lookout (30 minutes, optional)
- Byodo-in Temple Hawaii (up to 30 minutes, optional)
- Kualoa Regional Park (15 minutes, optional)
- North Shore options: Sunset Beach (15 minutes) and Banzai Pipeline (15 minutes)
- Waimea Valley (about 1.5 hours)
- Waimea Bay (45 minutes)
- Dole Plantation (about 45 minutes)
- Turtle Bay Beach (about 1.5 hours)
- Green World Coffee Farms (30 minutes)
- Pearl Harbor National Memorial (3 hours, plus focused add-ons)
- Day 2: more of the same big hits, plus shopping and North Shore conditions
- Hanauma Bay again (3 hours)
- Waikele Premium Outlets + swap meet option
- Diamond Head + Blowhole + Nu’uanu Pali + Byodo-in
- Kualoa photo moment, then North Shore choices
- Waimea Valley + Waimea Bay + Dole + Turtle Bay + coffee
- Pearl Harbor block with the same add-ons
- Day 3: a slightly tighter north-to-Pearl Harbor shift (and one fewer North Shore gamble)
- Hanauma Bay opener (3 hours)
- Waikele + swap meet + Diamond Head + viewpoint chain
- Kualoa + Sunset Beach
- Waimea Valley, then shorter Waimea Bay, then Dole + Turtle Bay + coffee
- Pearl Harbor final day with the Arizona core and add-ons
- Star stops that are doing the heavy lifting for most people
- Hanauma Bay: snorkeling and photos without the rental-car scramble
- Diamond Head: the view is worth the effort, especially with guide support
- Pearl Harbor: plan around tickets, then enjoy optional add-ons
- Value math: when this feels worth it (and when it doesn’t)
- Who should book this private Oahu multi-day tour
- Should you book it?
- FAQ
- FAQ
- How much is the tour and how many people does it cover?
- How long is the tour?
- What time does the tour start, and is pickup included?
- Are meals and admission tickets included?
- Do I need to book USS Arizona Memorial tickets in advance?
- Is the Aloha Stadium Swap Meet included every day?
- Is the Banzai Pipeline stop guaranteed?
- Can I bring check-in luggage?
- Can I cancel and still get a full refund?
Key takeaways before you book
- Private pickup + car-free routing across Oahu so you’re not stuck with traffic and parking.
- A custom-fit three days, with optional add-ons you can swap based on your interests and energy.
- Star Oahu hits in one plan: Hanauma Bay, Diamond Head, Waimea Valley, Dole Plantation, and Pearl Harbor.
- Pearl Harbor without the stress of deciding what to do first—plus optional add-ons at Ford Island.
- Timing matters, and Michael’s approach is focused on staying ahead of peak moments.
Price and logistics: what $1,997.50 really buys you
This is priced at $1,997.50 per group. The pricing note says up to 4 people per group, while the tour description also says the private tour can accommodate up to 10 people. That’s a potential mismatch, so I’d treat it as a “confirm at booking” item—especially if you’re traveling with a larger family or a mixed-age group.
What you do get for that money is the big, practical stuff:
- Driver/guide + private tour
- All transportation included, which is the part that usually costs time and headaches when you’re DIY
- A structured 3-day flow that starts at 8:00am and ends back at the meeting point
What you don’t get:
- Food & drinks
- Admission tickets (unless a stop is marked as free in the plan)
- Equipment rental fees
So you’ll budget separately for entry fees you choose, meals, and any snorkel/swim gear rentals.
Also pay attention to the pickup limits. Pickup can be arranged at most licensed vacation rentals, but some neighborhoods don’t allow commercial vehicles, in which case you’ll get a close-by drop-off/pick-up location. If you’re arriving by cruise or you have flights to coordinate, you’ll want to confirm those details at checkout so the morning start is realistic.
One more logistics detail that matters more than most people expect: the tour is not available for guests with check-in luggage. If you’re bringing checked bags (common on multi-week trips), you’ll need to use the provider’s separate first/last day tour option.
You can also read our reviews of more private tours in Oahu
The guide factor: Michael’s style that keeps a trip stress-free
I love tours that protect your energy. This one is set up that way because the guide is in charge of driving and pacing, and because the tour is private—so you can ask for changes without the “ask the group” math.
The strongest signal from the guide stories is responsiveness during planning and active help during the day. Michael is described as:
- Very responsive during trip setup
- Proactive about fitting everything you care about into limited time
- Warm and engaging enough to handle teen-level attention spans
- Focused on avoiding peak periods so your days don’t dissolve into queues
- Willing to do hands-on help, including walking someone up Diamond Head
That last point is underrated. Diamond Head isn’t a technical climb, but it can be a grind—especially in heat. If you have anyone in your group who gets nervous or simply tires quickly, having a guide who adjusts pace and physically helps with logistics can change the whole experience.
Day 1: Hanauma Bay, shopping stops, Diamond Head, and a long day toward Pearl Harbor
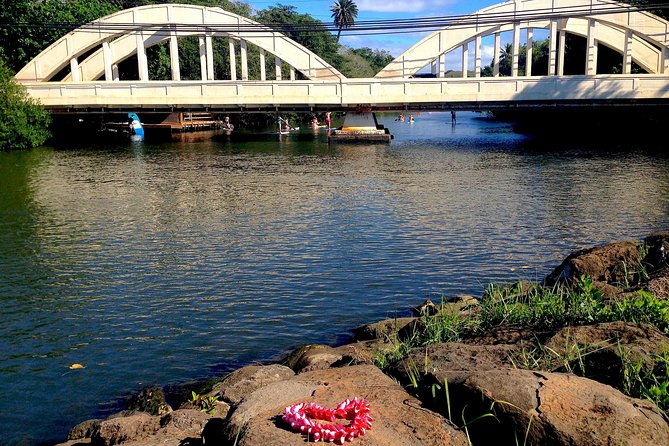
Day 1 is built around a classic Oahu arc: morning sea time, iconic crater views, then a pivot to north shore and historical Oahu.
Hanauma Bay Nature Preserve (3 hours)
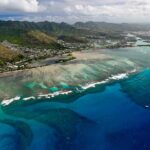
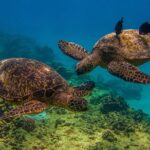
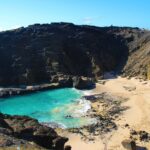
This is the “wake up to volcanic beauty” start. Hanauma Bay is a world-famous crater setting on the South Shore and it’s great for snorkeling or photos. It’s listed as 3 hours, and the plan notes admission as free.
Important practical point: snorkeling gear rentals are not included, so you may want to bring your own or plan to rent locally (at extra cost). Also, the timing matters—if you’re sensitive to crowds or heat, ask your guide how you’ll manage your time inside the bay.
Waikele Premium Outlets (1.5 hours)
After Hanauma, you get a shopping block at Waikele Premium Outlets, with time you control (1 hour 30 minutes in the average plan). Tickets aren’t included here (also typical), but the upside is straightforward: you can do your shopping without guessing how long you’ll need.

Aloha Stadium Swap Meet & Marketplace (optional by day)
This is optional and tied to specific days: Wednesday, and most Saturdays and Sundays. If your timing matches, it’s a fun way to pick up local crafts and snacks while still staying on schedule.
Diamond Head State Monument (about 1 hour)
You can hike to the top or view from the base. The plan gives about 1 hour for the hike. This is the stop where a guide’s pacing really matters—especially with mixed ages.
Halona Blowhole (15 minutes, optional)
A quick hit when the route passes the South Shore. Fifteen minutes is enough for the classic “it shoots water” photo moment, then you move on before the day stalls.
Nu’uanu Pali Lookout (30 minutes, optional)
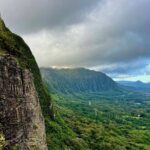
This viewpoint is about Windward Oahu panoramas—a scenic break that’s easier than a full hike.
Byodo-in Temple Hawaii (up to 30 minutes, optional)
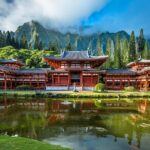
A quieter stop at the base of the Ko’olau range. You control the time. This works well as a reset button after busier stops, especially if you want a slower, respectful cultural moment.
Kualoa Regional Park (15 minutes, optional)
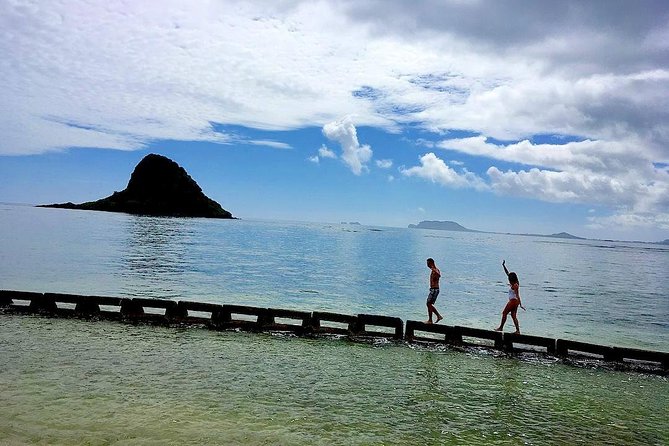
This is for pictures of Mokoliʻi, commonly called Chinaman’s Hat. It’s short and focused, which is exactly what you want when you’re trying to fit in a lot.
North Shore options: Sunset Beach (15 minutes) and Banzai Pipeline (15 minutes)
Sunset Beach is offered as an option, with a season note: in winter it can mean massive waves and surfing; in summer it can be calmer.
Banzai Pipeline is another 15-minute option and it’s dependent on available parking. That dependency is the key drawback of this stop: you can plan for it, but you may not always get it if parking and timing don’t cooperate.
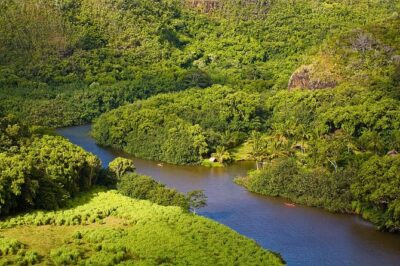
Waimea Valley (about 1.5 hours)
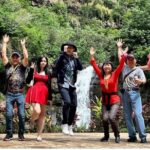
A longer nature-and-water break: you walk through botanical gardens toward a waterfall with a pool that’s listed as deep enough for swimming. It’s rated as a good fit for all ages and abilities, and your time here can flex.
Waimea Bay (45 minutes)
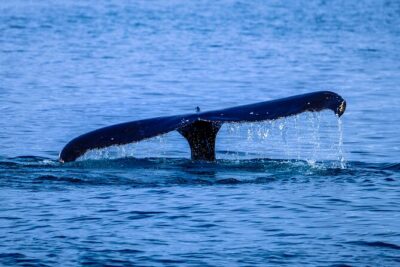
Another water-focused stop. It’s positioned as a summertime snorkeling option and a wintertime monster-wave watch spot. This is where you’ll see how Oahu changes by season.
Dole Plantation (about 45 minutes)
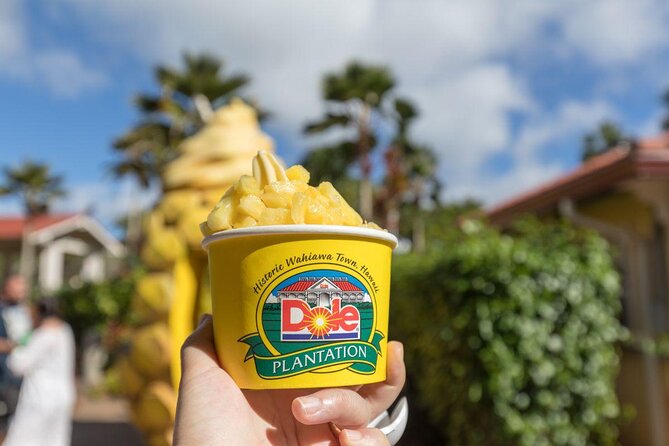
A classic stop for Dole Whip, plus options like the Pineapple Train or the Pineapple Maze. It’s short enough to keep your day intact, but long enough to enjoy the food and pick up souvenirs.
Turtle Bay Beach (about 1.5 hours)
This is a longer stretch for food, cocktails, swimming, and snorkeling in summer—or for watching surfers in winter. The plan gives flexibility: you can adjust based on what you want that day.
Green World Coffee Farms (30 minutes)
A quick coffee stop with tastings and exploration of coffee plants. If you like bringing home edible souvenirs, this is a better bet than another generic roadside shop.
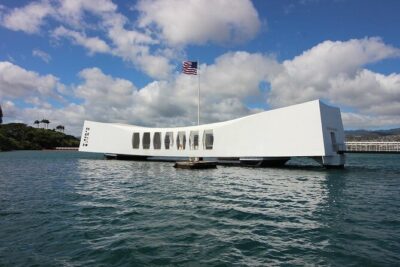
Pearl Harbor National Memorial (3 hours, plus focused add-ons)
This is a major chunk of Day 1, and it’s where the tour’s value really shows. You’re not just dropped off with a map—you get a coordinated flow with optional attractions.
The plan includes:
- USS Arizona Memorial (time listed as 1.5 hours; admission marked free, but tickets must be booked in advance via recreation.gov)
- Optional additions:
- Battleship Missouri Memorial: includes a 35-minute guided tour as part of the experience block
- Pearl Harbor Aviation Museum: includes an audio set tour, and you even have the option to ride a realistic flight simulator (admission not included)
- USS Bowfin Submarine Museum & Park: includes an audio set tour
The key practical benefit: Arizona requires advance reservations. The rest is structured as optional so you can match your interest level without getting stuck.
Day 2: more of the same big hits, plus shopping and North Shore conditions
Day 2 repeats several of the most popular anchors—Hanauma Bay, shopping, and another run toward the north and Pearl Harbor—but with choices that keep it from feeling redundant.
Hanauma Bay again (3 hours)
Yes, it repeats. That can be a good thing. If you want extra snorkel time, photos, or you’d like a backup if the first day’s conditions weren’t ideal, having Hanauma on Day 2 gives you room.
Waikele Premium Outlets + swap meet option
Waikele is again on the schedule, giving you the option to finish shopping if Day 1 went fast—or do it fresh if you want a calmer start. The swap meet option follows the same day pattern as described earlier (Wednesday, plus most Saturdays and Sundays).
Diamond Head + Blowhole + Nu’uanu Pali + Byodo-in
These stops blend into each other: hike/view, quick photo break, scenic lookout, then a calmer cultural moment. The overall win for you is pacing. You get physical variety without having to plan it yourself.
Kualoa photo moment, then North Shore choices
You’ll see the same idea again:
- Mokoliʻi / Chinaman’s Hat photo stop
- Sunset Beach option for seasonal surf conditions
- Banzai Pipeline option, again depending on parking
Waimea Valley + Waimea Bay + Dole + Turtle Bay + coffee
Day 2 uses the same pattern of nature-water-fun-food:
- Waimea Valley for the waterfall walk
- Waimea Bay for snorkeling in summer or big waves in winter
- Dole Plantation for pineapple treats
- Turtle Bay for a beachy hang (summer calmer water and snorkeling; winter surf watch)
- Green World Coffee Farms for tastings and souvenirs
Pearl Harbor block with the same add-ons
Arizona Memorial is again the core, with the ticket requirement unchanged. The optional Ford Island add-ons remain your choice: battleship, aviation museum, and the USS Bowfin submarine.
Day 3: a slightly tighter north-to-Pearl Harbor shift (and one fewer North Shore gamble)
Day 3 keeps the “icon” approach, but it drops one of the north shore options from the typical list—so the day feels a bit more controlled.
Hanauma Bay opener (3 hours)
Again, Hanauma Bay is the start. This makes Day 3 a good fit if you want a final chance to snorkel, take photos, or just enjoy the crater scenery without worrying about the rest of the day slipping.
Waikele + swap meet + Diamond Head + viewpoint chain
The day still includes Waikele outlets (1.5 hours), the swap meet option, Diamond Head (about 1 hour), Halona Blowhole (15 minutes), Nu’uanu Pali (30 minutes), and Byodo-in Temple time.
Kualoa + Sunset Beach
You still get the Mokoliʻi photo stop and a Sunset Beach option. This is a cleaner Day 3 because Banzai Pipeline isn’t listed here, which can reduce the “parking gamble” factor.
Waimea Valley, then shorter Waimea Bay, then Dole + Turtle Bay + coffee
Day 3 gives:
- Waimea Valley about 1.5 hours
- Waimea Bay listed shorter (15 minutes in the plan)
- Then Dole Plantation, Turtle Bay Beach, and Green World Coffee Farms
Pearl Harbor final day with the Arizona core and add-ons
You still end with Pearl Harbor National Memorial and the USS Arizona Memorial (ticket required via recreation.gov). Add-ons include Battleship Missouri, Pearl Harbor Aviation Museum, and USS Bowfin Submarine Museum & Park.
Star stops that are doing the heavy lifting for most people
Some of these places are “musts” for first-timers, and this tour hits them in a way that reduces decision fatigue.
Hanauma Bay: snorkeling and photos without the rental-car scramble
Hanauma Bay’s crater setting makes it the kind of stop where a few extra minutes can turn into great photos—or a better snorkel experience. The tour schedules it for 3 hours, and it’s offered across multiple days, which gives you flexibility if one day gets crowded.
Remember: equipment rental fees are not included, so if you’re not bringing your own gear, budget extra.
Diamond Head: the view is worth the effort, especially with guide support
Diamond Head is the stop where you’ll want to go in with the right expectations. You can hike to the top or keep it to lookout views, and the plan gives about 1 hour. With Michael’s reported willingness to help people up, it’s a smart choice if your group includes anyone who needs a little extra encouragement.
Pearl Harbor: plan around tickets, then enjoy optional add-ons
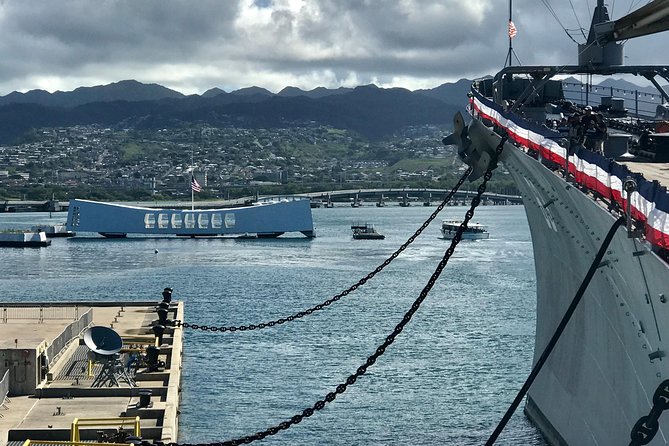
The USS Arizona Memorial part of the plan is clear: tickets must be booked in advance via recreation.gov. That’s the hard requirement. Once you’ve handled that, the rest of the memorial time works like a choose-your-own-depth experience:
- Want more guided, structured content? Add the Battleship Missouri guided segment.
- Want a more interactive museum approach? Add the Aviation Museum, including the flight simulator option.
- Want a close-up look at wartime life underwater? Add the USS Bowfin audio-toured visit.
Value math: when this feels worth it (and when it doesn’t)
At $1,997.50 per group, the value comes from three places: transportation, time management, and not having to orchestrate tickets and routes under your own steam.
This setup tends to make sense if:
- You’re traveling with enough people that a private car service becomes reasonable
- You want to avoid rental-car stress on traffic-heavy days
- You care about hitting big attractions without the “what’s next?” decisions
- You’d rather spend your energy on stops than on logistics
It might feel less cost-effective if:
- You’re extremely budget-driven and would rather DIY everything
- You already plan to rent a car and you’re comfortable with parking and routing
- You’re hoping admission and meals are covered (they aren’t, except where stops are marked free)
One more value lever: because optional stops depend on day and conditions (like swap meet timing and parking at Banzai Pipeline), you’ll want to decide what’s “must-see” versus “nice if we can.” A responsive guide makes that easier.
Who should book this private Oahu multi-day tour
This tour is a strong fit for:
- Families with mixed ages who need pacing and help with movement-heavy stops
- First-time Oahu visitors who want the highlights without planning daily routes
- Groups who want a guide to handle timing and reduce waiting around
- Teen groups, since the guide approach is described as engaging and phone-proof
It’s not the best fit if:
- You have check-in luggage
- You want everything done at your own pace with no guidance
Should you book it?
If you want an Oahu trip where you can focus on the sights and not the drive, I’d lean toward booking. The biggest reason is the combination of private pickup, driver-led routing, and a guide who’s known for staying responsive and managing timing.
Do one homework task before you pay attention: book USS Arizona Memorial tickets through recreation.gov as required, and confirm how the group-size pricing works for your headcount. If you do that, you’ll walk into three days of major Oahu moments without the usual logistics stress.
FAQ
FAQ
How much is the tour and how many people does it cover?
The price is $1,997.50 per group (up to 4). The tour description also notes the private tour can accommodate up to 10 people, so it’s best to confirm the exact headcount rules when booking.
How long is the tour?
It’s a 3-day tour (approx.).
What time does the tour start, and is pickup included?
Pickup details are arranged after you confirm your flight/cruise/hotel information. The tour starts at 8:00am, and it ends back at the meeting point.
Are meals and admission tickets included?
No. Food and drinks and admission tickets are not included (unless a stop is specifically marked as free in the plan). Equipment rental fees are also not included.
Do I need to book USS Arizona Memorial tickets in advance?
Yes. Arizona Memorial tickets must be booked in advance via recreation.gov.
Is the Aloha Stadium Swap Meet included every day?
It’s optional and tied to specific days: the plan says it’s available on Wednesdays and most Saturdays and Sundays.
Is the Banzai Pipeline stop guaranteed?
No. The plan says it depends on available parking.
Can I bring check-in luggage?
Not in general. The tour is not available for guests with check-in luggage. Those guests must book the provider’s separate private first/last day tours.
Can I cancel and still get a full refund?
Yes. You can cancel up to 6 days in advance for a full refund (you must cancel at least 6 full days before the experience’s start time).