REVIEW · CANOES & KAYAKS
Self-Guided Kayaking Discovery in Kailua, Oahu
Book on Viator →Operated by Kailua Beach Adventures · Bookable on Viator
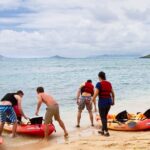
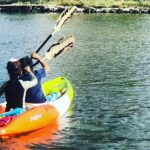
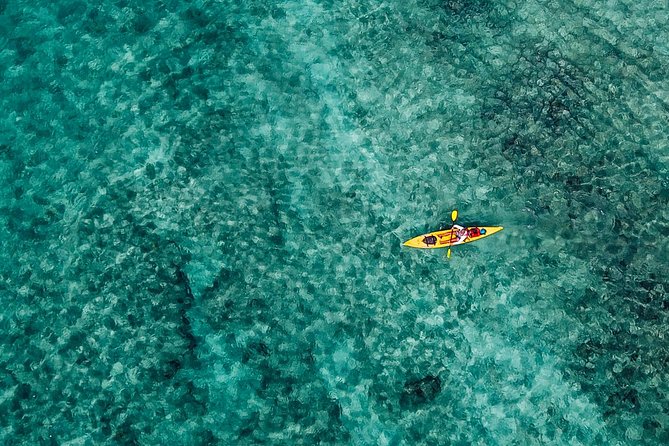
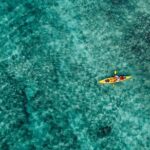
Kayaking to the Mokes feels like cheating. You paddle your own pace from Kailua Bay out toward the offshore islands, with snorkel gear, permits, and beach time built in. I love the self-guided setup because you can stop when you want and linger when the water is calm.
Two more things I really like: you get a full snorkel-and-beach gear package (life jacket, paddle, backrest, dry bag, plus snorkeling gear), and you also pick up free add-ons like bikes for ages 13+ plus chairs and boogie boards. The main drawback to plan around is that this isn’t a sit-back-and-float day. You’ll do real paddling and some dragging/walking with the kayak, and windy days can turn it into a workout, especially if you’re new.
In This Review
- Quick Hits Before You Go
- Why This Self-Guided Kailua Kayak Day Feels Different
- Getting There and Checking In at 130 Kailua Rd
- Your Gear Kit: Kayak, Snorkel Equipment, Dry Bag, and More
- The Route Logic: Lanikai Beach, Mokulua Islands, and Kailua Return
- Stop 1: Lanikai Beach for Snorkel Time and a Bike Option
- Stop 2: Mokulua Islands (Mokes) and the Bird Sanctuary Feel
- Stop 2 Extra: Tide Pools and Flat-Island Time
- Stop 3: The Kailua Return and the Real Work Part
- Lunch, Showers, and the Comfort Stuff That Makes Days Easier
- How Hard Is It? The Wind, the Waves, and Your “New Kayaker” Test
- Value for $110.17: What You Really Get for the Price
- The Best Weather Day to Choose (and What to Pack)
- Who Should Book This Kayak Day in Kailua?
- Should You Book? My Practical Take
- FAQ
- How long is the self-guided kayaking experience?
- Where does the tour start and where does it end?
- What’s included with the kayak and snorkel gear?
- Are bikes included, and is there an age limit?
- Do I need to bring snorkel equipment?
- Is this guided or self-guided?
- Is there hotel pick-up available for certain times?
- What’s the cancellation policy if weather is bad?
Quick Hits Before You Go
- Self-guided pacing: You control the stops instead of racing a schedule.
- Snorkel gear + permits: Island landing permits are included, so you’re not stuck just outside the surf.
- Free bikes (13+): Ride to Lanikai for snorkeling between paddling stretches.
- Beach comfort extras: Beach chairs and boogie boards help turn downtime into downtime.
- Expect some effort: Walking/rolling the kayak to the water is part of the deal.
Why This Self-Guided Kailua Kayak Day Feels Different
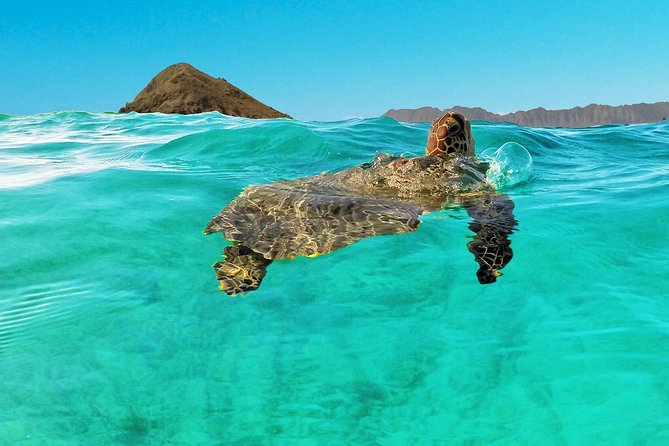
This experience is built around freedom. You’re not waiting on a guide to tell you when to move, where to look, or when to take a break. If you like watching turtles for a minute too long, this is your style.
The route is also designed for variety. You’re out on the bay in a kayak, then you can dip and snorkel, then you can land for beach time on the offshore islands. That mix is why it works so well for both laid-back days and active ones.
The best part is that it’s still a “package day.” You’re not piecing together kayak rental, snorkel gear, and island access. You show up, get outfitted, and go.
You can also read our reviews of more guided tours in Oahu


Getting There and Checking In at 130 Kailua Rd
The meeting point is 130 Kailua Rd, Kailua, HI 96734. You should plan to check in 15 minutes before your start time, and you’ll use a mobile ticket.
This location is also handy for timing. It’s near public transportation, and if you’re driving, you’ll likely appreciate being able to park close to where the day begins. The day runs about 5 hours, so you’re not burning your whole afternoon on logistics.
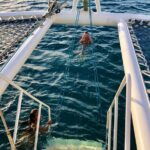
One small practical thing: since this is self-guided, the first moments matter. Pay close attention to how to get from the start point to the water and how to get organized with your gear.
Your Gear Kit: Kayak, Snorkel Equipment, Dry Bag, and More
Included gear covers both safety and comfort. You get a life jacket, paddle, and backrest, plus snorkel gear and a dry bag. That dry bag detail matters because you can keep your phone and small essentials dry while you’re switching between paddling and snorkeling.
You also get beach-friendly supplies: beach chairs and boogie boards. If you plan to spend time on shore instead of rushing back to the kayak, these make the day feel more like a full outing.
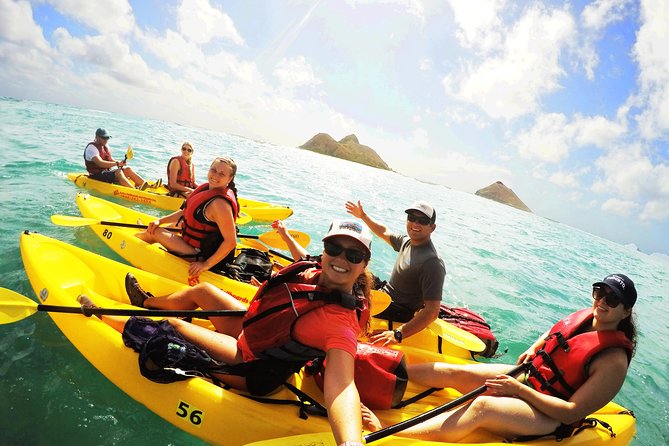
Kayaks come as double or single options. If wind gets involved, the double can feel easier because you’re not wrestling everything alone. And yes, you should assume you’ll want decent sun protection.
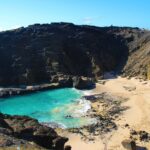
The Route Logic: Lanikai Beach, Mokulua Islands, and Kailua Return
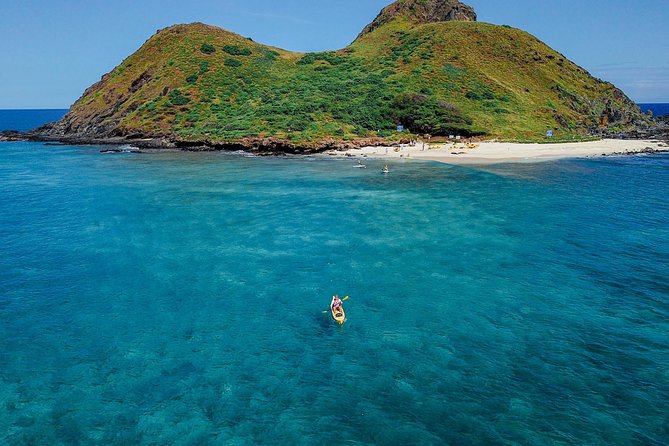
Here’s how the day tends to unfold when you’re choosing stops: you start with time around Lanikai Beach, then you head out to the offshore Mokulua Islands, and you end back in Kailua.
What makes the sequence work is that it gives you an easy win early. Lanikai is known for clear water and snorkeling-friendly time, so you can get comfortable in your rhythm before you go farther out.
Then comes the bigger payoff: the offshore landings. Mokulua Islands are bird-nesting sanctuaries, and the landing access is a big part of the value because permits are included. You’re not just kayaking past scenery—you’re getting to touch the experience on shore.
Finally, the return is where you’ll want to keep your bearings. People mention kayak-handling after the island stop can feel like more work than the paddling itself, so it helps to stay calm and organized for the last stretch.
Stop 1: Lanikai Beach for Snorkel Time and a Bike Option
Lanikai Beach is your first major stop. This is where you can ease in, snorkel, and enjoy the lighter side of the day before you commit to the offshore portion.
If you’re the type who likes doing things in parallel, there’s another bonus: free bike rentals for ages 13 and up. That means you can swap from kayak to bike and ride to Lanikai for more snorkeling time around the beach area.
Practical tip: wear durable shoes and plan for some wet sand moments. A lot of the day’s comfort comes from not rushing your footing.
Also, bring extra sunscreen or plan to reapply. The sun in Kailua is not shy, and being stuck out in the water makes it harder to manage once you’re rolling.
You can also read our reviews of more tours and experiences in Oahu


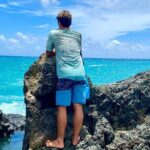
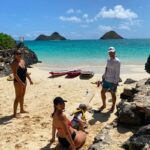
Stop 2: Mokulua Islands (Mokes) and the Bird Sanctuary Feel
This is the main event. Mokulua Islands are protected bird-nesting sanctuaries, so the vibe is remote and quiet compared to most beach days. Landing access is part of the experience value because island landing permits are included.
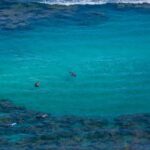
Onshore time here is where you can get some memorable wildlife encounters. From the info you’re given on the day and the outcomes people report, you can expect a good chance of seeing marine life while snorkeling—turtles show up often enough that you can’t count on certainty but you can count on a real possibility.
People also report seeing bird nesting activity and even baby birds during certain seasons. If you like nature details, this stop has that “payoff” feeling—especially when you’re out of earshot of crowds.
Wind matters here. If the day is breezy, kayaking to and from offshore islands can take more effort than on calm mornings. If you’re newer, consider choosing a day early in your trip and be honest with yourself about your energy.
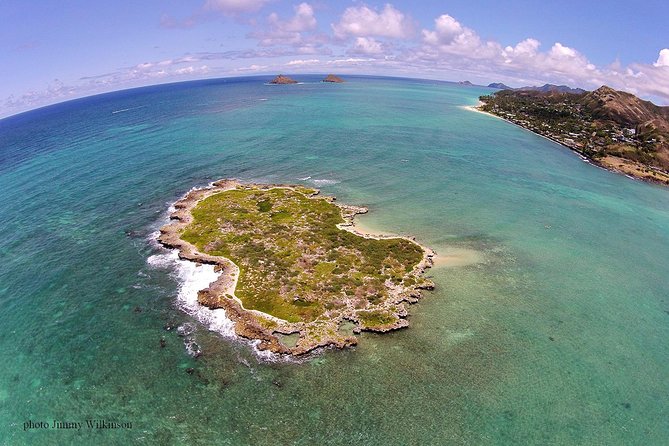
Stop 2 Extra: Tide Pools and Flat-Island Time
Some versions of the day include a look at Flat Island, where you can see tide pools and lots of rocky shoreline detail. This isn’t a random add-on; it fits the overall theme of remote water access and shoreline exploration.
If you get the chance, this is one of the best “slow down and look” moments. It turns the day from pure kayaking into a full exploration loop: paddle, land, snorkel, then stare at tide pools like you’ve never seen rocks before.
Stop 3: The Kailua Return and the Real Work Part
The return is back to the meeting point, so your day ends where it starts. That sounds simple. It’s not always simple.
The self-guided nature means you’re responsible for your own kayak handling at the end. A common theme is that getting kayaks back can be a hassle—especially if they keep slipping off the cart or if you’re tired and the sand is grabbing your feet.
The workaround is mental: keep track of where you launched from. If you do, you avoid the classic problem of backtracking through the wrong stretch of shoreline.
Also, if you’re going with a group or family, agree early on a simple plan for who does what when you return. It makes the last 30–45 minutes feel manageable instead of chaotic.
Lunch, Showers, and the Comfort Stuff That Makes Days Easier
Even though you’re out on the water, the day isn’t designed to be a survival exercise. Many people find the included lunch voucher element a real perk, and some report grabbing food from a deli nearby.
You also get a nice comfort layer: changing facilities and bathrooms with a shower are part of the setup described in the experience details. That’s the difference between feeling refreshed after and feeling like you have to immediately go home to wash the day off.
Lockers are also mentioned as available, with a code tied to your wristband. If you hate carrying personal items around, that’s worth using.
How Hard Is It? The Wind, the Waves, and Your “New Kayaker” Test
This trip is described as welcoming for different ages and levels, but the reality of self-guided kayaking depends on conditions. On calm water, it feels like a fun, scenic workout. On a windy day, it can become physically demanding quickly.
Some people report needing strong help while getting the kayak in and out, and others note that first-timers should be ready for a struggle. That means your best preparation is not optimism. It’s planning and honesty.
Here’s what to watch for:
- If you’re prone to getting tired quickly, choose a tandem/double kayak when possible.
- If winds are heavier than expected, expect extra effort to hold your line and return safely.
- If you’re unsure about kayak handling, give yourself a shorter, more conservative plan rather than pushing offshore farther than you can manage comfortably.
One more practical note: the route involves canal areas at the start, and at least one person mentions concerns about water quality in that part of the day. You can’t control the water, but you can control your plan—bring a towel, rinse off when you’re done, and keep your expectations realistic.
Value for $110.17: What You Really Get for the Price
At $110.17 per person for about 5 hours, this isn’t a bargain if you compare it to a beach day rental. But it’s strong value if you compare it to the full package you’re getting.
You’re paying for:
- a kayak rental setup (including proper outfitting like life jackets and backrests)
- snorkel gear for the day
- island landing permits
- the time on the water that’s hard to recreate on your own
- bonus beach and shoreline items like boogie boards and beach chairs
- free bike rentals for ages 13 and up
- lunch via voucher reported as part of the day’s value by many participants
So the price makes more sense when you look at it as a one-stop ticket to multiple activities in one day: paddle + snorkel + bike + beach.
Booking it about 23 days in advance on average also suggests people like securing a good weather window early. That’s smart in Oahu, where wind and swell can change your experience fast.
The Best Weather Day to Choose (and What to Pack)
The experience requires good weather. That means your “best day” is usually when skies are clear and wind is mild enough for offshore paddling to feel doable.
What you pack is key:
- reef-safe sunscreen if you use it (you’ll definitely want it)
- water shoes or sandals with grip
- a rash guard or light long-sleeve if you burn easily
- a dry change of clothes for after (especially if you’ll use the shower)
Also, keep your expectations aligned. This isn’t just sightseeing from shore. You’re going out into the bay and doing real water work.
Who Should Book This Kayak Day in Kailua?
This works best if you want a day that blends nature and exercise without the tight pressure of a guided itinerary. If you like choosing your own pace, stopping for tide pools, and spending extra time when the wildlife shows up, you’ll probably love the format.
It also fits families who want a kid-friendly beach component plus an adventure they can handle together. Just be honest about energy and water comfort, since this is self-led and wind can change the tone fast.
If you’re brand-new to kayaking and expect everything to be easy, you might be safer choosing a different kind of tour or picking a calmer day. Some people found the experience tough when conditions were rough or when they weren’t expecting the kayak-handling part of the trip.
Should You Book? My Practical Take
I’d book this if you want a high-value day with snorkeling access, offshore island landings, and a built-in beach-and-bike combo. The included gear list is real, and the permits remove a lot of friction you’d otherwise handle on your own.
I’d think twice if you’re easily discouraged by physical effort or if you know you struggle with boats, wind, or sand-to-water transitions. In that case, your success will hinge on weather and your own comfort level more than most people expect.
If you match the trip to the conditions and go in prepared, this is one of those rare Oahu activities that lets you feel like you found your own slice of Kailua Bay.
FAQ
How long is the self-guided kayaking experience?
It runs about 5 hours, roughly, from start to finish.
Where does the tour start and where does it end?
It starts at 130 Kailua Rd, Kailua, HI 96734 and ends back at the same meeting point.
What’s included with the kayak and snorkel gear?
You get kayak rental plus snorkel gear and a life jacket, along with a dry bag. Bikes (age 13+), boogie boards, and beach chairs are also included.
Are bikes included, and is there an age limit?
Yes. Free bike rentals are included for ages 13 and up.
Do I need to bring snorkel equipment?
No. Snorkel gear is included with the package.
Is this guided or self-guided?
It’s self-guided. You kayak on your own schedule and follow the provided instructions for where to go.
Is there hotel pick-up available for certain times?
Hotel pick-up/drop-off is offered for the 9:15 tour time for $30 per person.
What’s the cancellation policy if weather is bad?
You can cancel for a full refund up to 24 hours in advance. If it’s canceled due to poor weather, you’re offered a different date or a full refund.