REVIEW · CANOES & KAYAKS
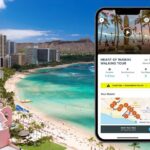
Kailua Bay, Oahu: Epic Kayak and Snorkel to Islands
Book on Viator →Operated by Kailua Beach Adventures · Bookable on Viator
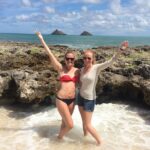
Kailua Bay by kayak feels like Oahu’s best kept secret. This small-group eco trip takes you past pristine beaches and out toward the bird sanctuaries of the Mokulua Islands or Flat Island, with snorkeling and a real beach lunch built in. If you like your Hawaii days active, scenic, and well-run, this is a strong fit.
I especially like how much is included: kayak + snorkel gear + dry bag + locker + showers, plus a deli lunch. I also like the small group size (max eight), which makes it easier to get comfortable in the water and keep your day from turning into a crowded cattle drive. Guides like Mike, Isaac, Tupre, and Evelyn come up again and again for staying organized and explaining the area and wildlife in a practical way.
The main consideration is effort and conditions. You are responsible for moving a heavy kayak down to the beach by cart and dragging it over sand, and wind can affect how far you paddle and what snorkeling looks like on the day.
In This Review
- Key highlights worth showing up early for
- Kailua Bay by kayak: why this Oahu outing feels worth the early start
- First things first: check-in, equipment, and the quick skills that keep it fun
- Stop-by-stop on Kailua Bay: from soft sand launch to the Mokulua sanctuary
- Stop 1: Kailua launch and orientation (the 1-hour setup that sets the tone)
- Stop 2: Kailua Beach Park (the family-friendly launch zone)
- Stop 3: Lanikai Beach for the views and the snorkeling zone
- Stop 4: Mokulua Islands (or Flat Island): the bird sanctuary payoff
- Snorkeling with green sea turtles at Lanikai: how to get the best shot
- Guided vs self-guided: which choice matches your comfort level
- Flat Island vs Mokulua Islands: the tradeoff between distance and island experience
- Lunch on the beach and showers after: why the comfort matters
- Wind, workout effort, and the real logistics you should plan for
- Value check: does $114.58 make sense for a 5.5-hour Kailua Bay day?
- Who should book this Kailua Bay kayak and snorkel tour
- Should you book it? My take for your Oahu plan
- FAQ
- How long is the Kailua Bay kayak and snorkel tour?
- What does the price include?
- Do I need pickup, and where does the tour start?
- Can I choose between guided and self-guided?
- Where do you snorkel during the trip?
- Is the tour good for beginners?
- Do I need to swim?
- What physical demands should I expect?
- What happens if weather is bad?
Key highlights worth showing up early for
- Small group, max eight: calmer pacing and more hands-on help when you need it
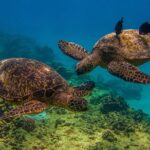
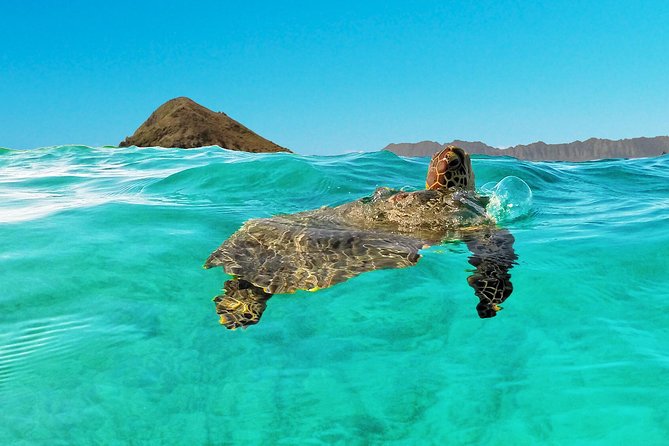
- Turtle chances at Lanikai: paddle along the coastline and snorkel in the warm, clear water
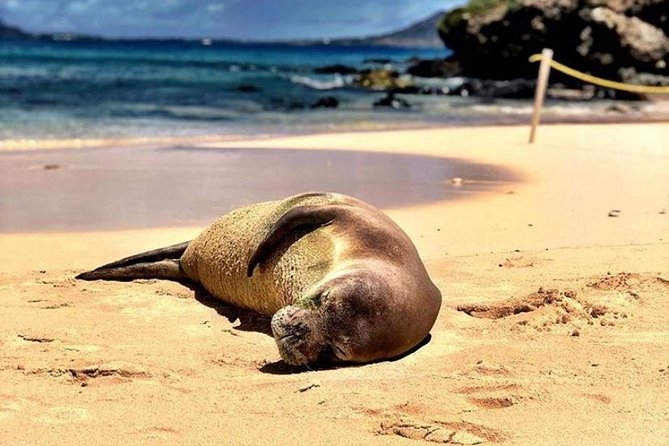
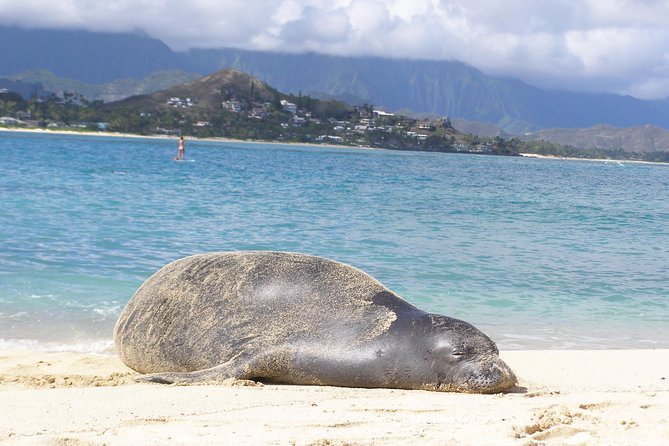
- Mokulua bird sanctuary access: a special-permission destination with monk seals and nesting birds
- Real island time: tide pool stop (Queen’s Bath) and time to swim and snorkel near the islands
- Lunch is part of the plan: a deli lunch, typically more than a sad sandwich, packed for you
- Options: self-guided or guided: choose how much coaching you want for ocean kayaking
Kailua Bay by kayak: why this Oahu outing feels worth the early start
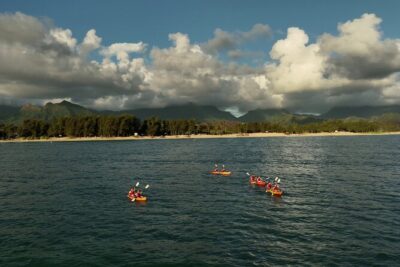
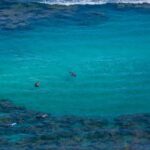
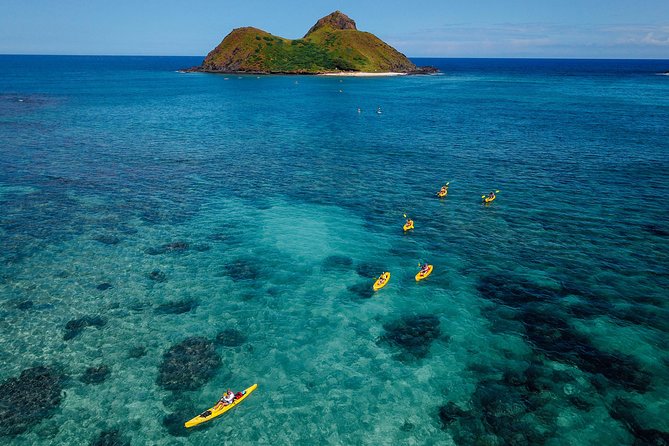
Kailua Bay is the kind of place where you look up and realize you’re surrounded by postcard-perfect water. The kayak portion is what makes this tour more than a photo stop. You’re moving through the bay from launch to shoreline, then out toward the island area where wildlife and quiet coves show up.
I like that the trip doesn’t rush you through the scenery. After you paddle out, you get a long enough stretch to actually enjoy the look-and-breathe rhythm: water view, gentle surf sounds, then snorkeling time, then island exploration.
And because this is a half-day, it fits neatly into an Oahu itinerary. You’re back in Waikiki between about 3:30 and 4:00 pm, which leaves room for dinner plans or one more beach stop without feeling wiped out for the whole day.
You can also read our reviews of more tours and experiences in Oahu
First things first: check-in, equipment, and the quick skills that keep it fun
You’ll meet at Kailua Beach Adventures, at 130 Kailua Rd in Kailua. If you chose hotel pickup, they run a set schedule from Waikiki area resorts (for example Kahala at 7:30 am and Ala Moana around 8:30 am). If you’re driving yourself, you can park in their lot, free.
At check-in (aim to arrive at least 15 minutes early), you’ll get oriented and fitted. Expect a safety briefing and some basic kayaking instruction before you launch. That matters because Kailua Bay can be calm, but you’re still paddling in open-water conditions, so good habits early make everything easier later.
Then comes the gear mix that makes the day practical:
- life jacket (provided)
- snorkel equipment
- dry bag
- locker for valuables
- showers and facilities when you return
A nice touch: there’s a full retail store on site, and Viator guests are offered 15% off items like reef-safe sunscreen and UV shirts if you need last-minute protection.
One logistics reality check: all guests must be able to swim. Also, kids 15 and under ride with an adult in a double (tandem) kayak, and there are weight limits on the kayaks (single-person up to 280 lbs, double-person up to 400 lbs). If you’re traveling with mixed-size family members, plan your pairing early.
Stop-by-stop on Kailua Bay: from soft sand launch to the Mokulua sanctuary
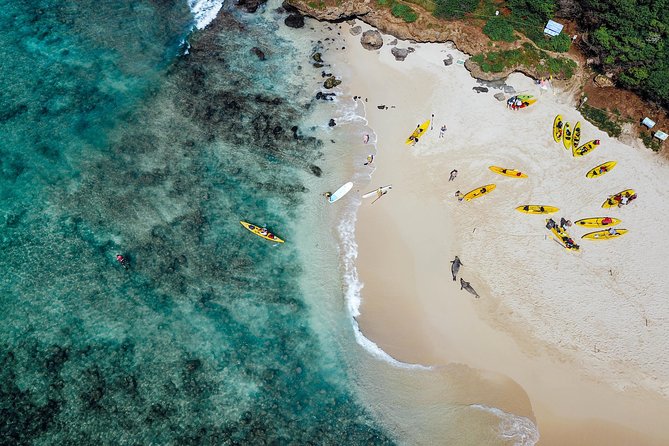
This tour is built around four main moments. The exact island choice can vary depending on wind and whether you go guided or self-guided, but the flow stays similar.
Stop 1: Kailua launch and orientation (the 1-hour setup that sets the tone)
Your day starts at Kailua Beach Adventures, a short walk (about five minutes) from Kailua Beach Park. This first block is when you get everything together: lockers, life jackets, snorkel gear, dry bag, and your kayak.
They also assign you a locker, which is a small thing that helps a lot. You don’t have to think hard about where to put your phone and keys while you’re on the water.
If you go guided, this is also when you get a route explanation and a feel for water conditions. Self-guided tours are still explained at the start, and the overall route planning is part of why this option works for independent paddlers.
Stop 2: Kailua Beach Park (the family-friendly launch zone)
Kailua Beach Park is known as one of Oahu’s more family-friendly beaches, and you’ll use it as the launch and landing point. That matters because it keeps the “getting in and out of the water” part straightforward.
You’ll spend about 30 minutes here, and it functions like the calm hinge between prep on land and real paddling time.


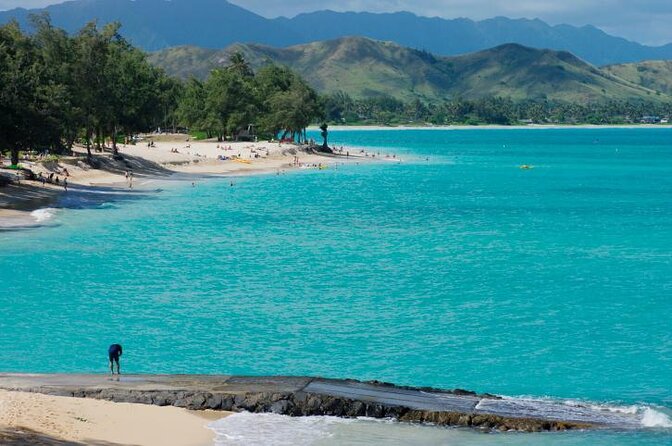
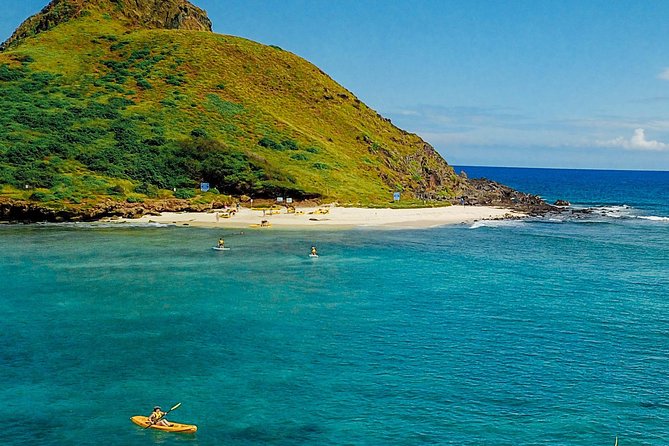
Stop 3: Lanikai Beach for the views and the snorkeling zone
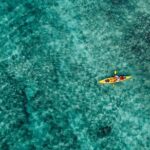
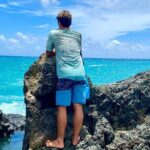
Next is Lanikai Beach, one of the most famous stretches in the islands for its soft sand and turquoise water. On a kayak, it’s not just a beach to look at. It becomes a long shoreline to track, with water clarity that makes snorkeling feel more natural.
This stop runs about 45 minutes. The goal is twofold: enjoy the paddle along the coastline, then set you up for snorkeling in that area. Many people time snorkeling here because the water tends to be warm and inviting when conditions cooperate.
Practical tip: treat snorkeling as part of your pacing strategy. Don’t burn all your energy paddling hard right before you get in the water. Save enough for steady kicks and relaxed breathing.
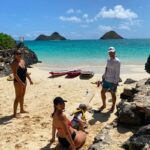
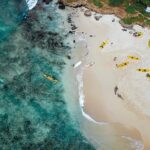
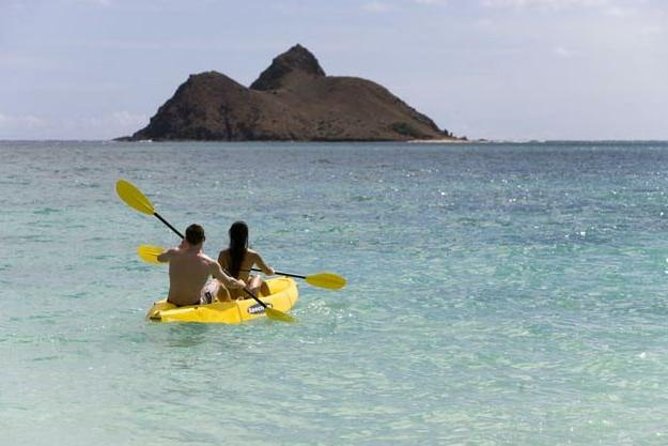
Stop 4: Mokulua Islands (or Flat Island): the bird sanctuary payoff
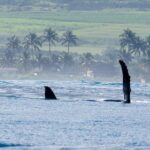
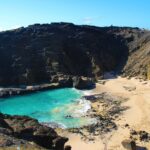
This is the best reason to do the trip. The final destination is the Mokulua Islands area—often described as a bird nesting sanctuary that requires special permission to visit. Moku Nui is the famed Twin Islands destination, with Hawaiian monk seals sometimes lounging on the beach and sea turtles seen around the reefs.
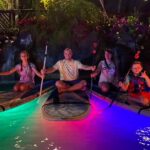
You also get a hike and tide-pool moment at Queen’s Bath: a short walk to a saltwater tide pool, sometimes described like a natural saltwater jacuzzi with a view. Then you return for snorkeling, looking for sea turtles and schools of tropical fish.
The time here is about two hours, which is long enough to do the hike, take breaks, and actually enjoy the island setting rather than just stepping off and sprinting back.
If you choose self-guided, the itinerary is described as flexible. That flexibility is important on windy days, when the farthest targets can change.
Snorkeling with green sea turtles at Lanikai: how to get the best shot
The tour includes snorkeling equipment and sets you up to snorkel in the Lanikai area and around the islands. Turtle sightings aren’t guaranteed, but the location is chosen for a reason, and you’ll be in the right water at the right time when the day is calm.
A few things help your odds:
- Go slowly once you’re in the water. Quick, splashing movements can make it harder to see wildlife.
- Keep your breathing steady and give yourself a moment to adjust before you start scanning.
- Watch for turtle behavior rather than chasing. If you see activity, pause and let it come to you.
One thing to know: wind can make snorkeling less practical. On certain days, the plan may shift to focus more on the kayaking and island access, with snorkeling time reduced or limited. If your heart is set on underwater time, pick an early morning slot (calmer water is more likely) and stay ready to adjust.
Guided vs self-guided: which choice matches your comfort level
You get a real decision here: self-guided or small-group guided.
Self-guided works well when you already feel comfortable with basic ocean kayaking, and you like moving at your own pace. Several people mention not having trouble following directions, and self-guided can feel empowering because you’re not waiting on a group to regroup.
But guided has a clear value if you’re new to the water, traveling solo, or you just want extra confidence. Guides are there to keep you safe and help interpret what you’re seeing. Names that come up include Mike (attentive and safety-minded), Isaac (company and local knowledge), and Tupre (helpful with wildlife spotting and island details).
One balanced way to decide:
- Choose self-guided if you’re comfortable with the physical work and basic skills.
- Choose guided if you want coaching, reassurance, and extra storytelling about the places you’re passing.
Flat Island vs Mokulua Islands: the tradeoff between distance and island experience
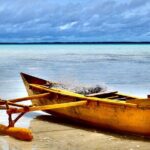
Depending on conditions, you may paddle to Popoia Island (Flat Island) or the Mokulua Islands. Both are about island time and water views, but they feel different.
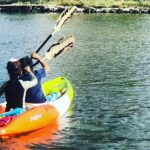
When you get to the far island option, you’re investing in distance and effort. That’s where the “workout” reputation comes from. One traveler noted a return distance close to 4.8 miles, and even when the exact number varies by route choices and conditions, you should plan for kayaking that uses real muscles.
Flat Island and the other island option can both be worth it. Some people specifically call out Flat Island as a satisfying target, while others talk about the Mokulua bird sanctuary experience being the main emotional payoff.
If you’re deciding based on energy, don’t underestimate the physical side. It’s not a leisurely paddle in a pond. It’s a workout with breaks that let you feel proud of what you did.
Lunch on the beach and showers after: why the comfort matters
This tour includes a deli lunch, and the equipment includes dry storage plus showers when you return. That combination makes the day feel complete.
Lunch details can vary, but you’re not left hunting for food after you get tired. Some guests describe the deli voucher options as things like freshly made sandwiches, big slices, or a Hawaiian plate lunch, packed so you can actually eat without dragging the whole operation around.
On a kayak day, comfort isn’t a luxury. Being able to rinse off, store gear safely, and sit down with lunch right after paddling makes it easier to enjoy the rest of your Oahu afternoon instead of feeling gross and depleted.
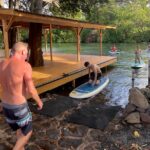
Wind, workout effort, and the real logistics you should plan for
Here’s the honest part: you’ll do work on land. You must transport the kayaks to the beach using a cart for about 15 minutes and then drag them over sand. The kayaks weigh about 70 lbs. If you’re traveling as a pair with one less-strong person, this can be the hard part of the whole day.
Also, wind changes everything. On windy days, paddling may be limited, snorkeling may be less practical, and you might not reach as far as planned. Still, people often report that the day stays enjoyable, especially because the locations are beautiful even without the farthest route.
If you want a smoother experience, go in with the right expectations:
- Expect the kayak portion to be a real effort.
- Bring reef-safe sunscreen and UV protection if the sun is strong.
- Plan on swimming ability being non-negotiable.
One review note that’s worth taking seriously: on challenging days, some couples found the kayak hauling back to the shop tougher than the water part. So if you have kids or a less mobile traveling partner, pick the guided option if possible, and be honest about who can handle the transport.
Value check: does $114.58 make sense for a 5.5-hour Kailua Bay day?
At about $114.58 per person for roughly 5.5 hours, this is not the cheapest activity on Oahu. But it’s also not bare-bones. You’re paying for a setup that removes a lot of planning and gear headaches:
- island landing permits are included
- kayak use is included
- snorkeling gear is included
- dry bags, lockers, and showers are included
- lunch is included
When you add up what a DIY day would cost (rental gear, figuring out spots, securing permits, and feeding everyone), the price starts to look more reasonable. The small-group cap of eight also helps the value feel “human scale,” not mass transport.
Booking seems popular, with an average advance window of about 28 days, so if you’re traveling in peak periods, lock it in early.
Who should book this Kailua Bay kayak and snorkel tour
This tour is a great match if you:
- want a half-day that’s scenic and physical
- like snorkeling but also enjoy land-to-water exploration
- want wildlife potential with sea turtles and monk seals nearby
- prefer a small group and clear setup
It may feel less ideal if you:
- struggle with carrying or dragging heavy gear
- don’t swim comfortably
- want zero physical effort and minimal exertion
- are hoping for guaranteed snorkeling outcomes on windy days
Families are welcome, but you should be ready for workout-level paddling and shared responsibilities with kayak handling. Kids under 15 need to ride with an adult in a tandem kayak, and everyone must be able to swim.
Should you book it? My take for your Oahu plan
If you’re trying to choose between a beach day and an active ocean day, this leans toward the ocean-adventure side in the best way. I’d book it when you want:
- a guided or self-guided option that fits your comfort
- real island time at the Mokulua destination area
- snorkeling tied to great locations like Lanikai
- a day that returns you to Waikiki with time left for dinner plans
If wind shows up, the plan can shift, but the day still tends to be remembered for the scenery, the turtle chances, and the fact that you’re doing something truly Hawaii: moving under your own power through Kailua Bay’s water.
If you’re willing to put in some effort on land and you can swim, this is one of the better-use-of-time activities on Oahu.
FAQ
How long is the Kailua Bay kayak and snorkel tour?
It runs about 5 hours 30 minutes on average.
What does the price include?
Kayak use, snorkeling equipment, dry bag, locker access, showers, island landing permits, safety briefing/instruction, and a deli lunch are included.
Do I need pickup, and where does the tour start?
The activity starts at Kailua Beach Adventures, 130 Kailua Rd, Kailua. Pickup is only available if you select that option, with set pickup times at multiple Waikiki-area locations.
Can I choose between guided and self-guided?
Yes. You can select a self-guided option or a small-group guided tour.
Where do you snorkel during the trip?
You kayak along Lanikai Beach and snorkel there, and you also snorkel around the island destination area (such as the Mokulua Islands / Moku Nui or the other island option, depending on conditions).
Is the tour good for beginners?
It can be, but you should be ready for real kayaking effort and ocean conditions. The tour provides instruction and life jackets, and guided options can help if you want more confidence.
Do I need to swim?
Yes. All guests must be able to swim, since life jackets are provided but swimming ability is still required.
What physical demands should I expect?
You’ll need moderate physical fitness. You also need to be able to transport kayaks to the beach using a cart and dragging over sand. The kayaks weigh about 70 lbs.
What happens if weather is bad?
This experience requires good weather. If it’s canceled due to poor weather, you’ll be offered another date or a full refund.