REVIEW · PHOTOGRAPHY SESSIONS
Beautiful Colors of Hawaii Photo Tour
Book on Viator →Operated by Oahu Photo Tours · Bookable on Viator
Oahu turns into a photo playground fast. I like that this small-group tour is built for hands-on picture-making, not just sightseeing, and I also love the Waikiki pickup and drop-off for an easy start. The only real downside to plan for: some viewpoints are exposed and windy, and pickup depends on your Waikiki hotel.
You’ll spend about 5.5 hours bouncing between color-rich lookouts and local moments, with practical guidance from a photographer guide and time at each stop to actually frame your shot. The vibe stays relaxed too, since the group maxes at 7 people, which means less waiting around and more direct help when you need it. Food is not included, so you’ll want to budget for lunch at the stop along the way.
In This Review
- Key things that make this photo tour worth your time
- Why this photo tour feels different from a normal Oahu day
- Price and what $99.95 buys you on Oahu
- Getting picked up: meeting point, timing, and comfort details
- The route that turns into postcard color: stops and what to focus on
- Pu’u ‘Ualaka’a State Park: easing into the photography game
- Nuʻuanu Pali Lookout: do your best work in the wind
- Koolaus Mountains: a quieter stretch with big payoff
- Ono Steaks and Shrimp Shack: meal break that still feeds the day
- Waimanalo Beach: iconic sand, short time, big mood
- Makapu‘U Point: where color and panoramics meet
- Halona Blowhole: the lava-tube moment and wildlife chances
- Hawaii Kai Lookout: a panoramic bay finish
- What the photographer guide actually helps you do
- The guide factor: the difference between seeing and creating
- What to know before you go: who it fits best
- Should you book Beautiful Colors of Hawaii Photo Tour?
- FAQ
- Is pickup available for Waikiki hotels?
- How long is the Beautiful Colors of Hawaii Photo Tour?
- What does the tour cost?
- Is food included?
- How many people are in the group?
- What should I wear since it runs rain or shine?
Key things that make this photo tour worth your time
- Hotel pickup in Waikiki keeps logistics simple and saves you the hassle of transfers.
- Small group size (max 7) means you get real attention when you’re trying to improve compositions.
- Phone-friendly photography coaching works even if you never use a real camera.
- Iconic stops like Nuʻuanu Pali, Halona Blowhole, and Waimanalo Beach pack a lot of Hawaii into one route.
- Plenty of stop time at each viewpoint so you’re not rushed from one photo to the next.
- A/C minivan transport helps during hotter stretches and keeps the day comfortable.
Why this photo tour feels different from a normal Oahu day
This tour is built around one idea: help you make better photos while you see the island. That’s why the schedule is packed with lookouts and coastal scenes, then gives you short, focused time blocks to shoot and adjust.
What I like most is the balance. You’re not stuck in a classroom, and you’re not left alone with a camera app either. The guides (you may hear names like Chris, Kurt, Andrew, Emily, Malcolm, and Mac) are repeatedly praised for giving clear, useful picture help and keeping the day easy to enjoy.
You can also read our reviews of more photography tours in Oahu


Price and what $99.95 buys you on Oahu
At $99.95 per person for roughly 5 hours 30 minutes, the value comes from two big items: door-to-door-style help from select Waikiki hotels and a guide focused on photography at multiple stops. You’re also traveling in an air-conditioned minivan, which matters when you’re bouncing between sun and wind along the coast.
The trade-off is simple: food and drinks are not included. You’ll have a local meal opportunity at Ono Steaks and Shrimp Shack, but you should expect to pay for what you order. If you want a fully covered lunch, plan for that extra cost.
Getting picked up: meeting point, timing, and comfort details

The day starts at the Honolulu Zoo (151 Kapahulu Ave, Honolulu). If you’re in Waikiki, you may get hotel pickup, but it’s only at selected hotels, so you’ll want to confirm your pickup spot directly. The tour ends back at the same meeting point.
You’ll also get a mobile ticket, and the tour operates rain or shine, so pack something for the weather. There’s only a small amount of walking, but some spots are outdoors and exposed, so comfortable shoes still matter.
The route that turns into postcard color: stops and what to focus on
This is a tight sequence of coastal and mountain viewpoints, and the stop durations are designed so you can shoot, then regroup. You’ll usually have around 20 minutes at most scenic stops, with a longer meal stop.
Pu’u ‘Ualaka’a State Park: easing into the photography game
You start at Pu’u ‘Ualaka’a State Park, where the goal is getting you oriented and ready to shoot. With about 20 minutes here and no cost for admission, it’s a good place to test your phone settings and learn how the guide wants you to approach framing.
If you’re nervous about camera work, this first stop is helpful because it sets the tone: watch the light, aim for clean lines, then adjust fast instead of overthinking.


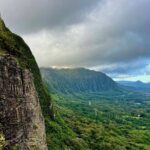
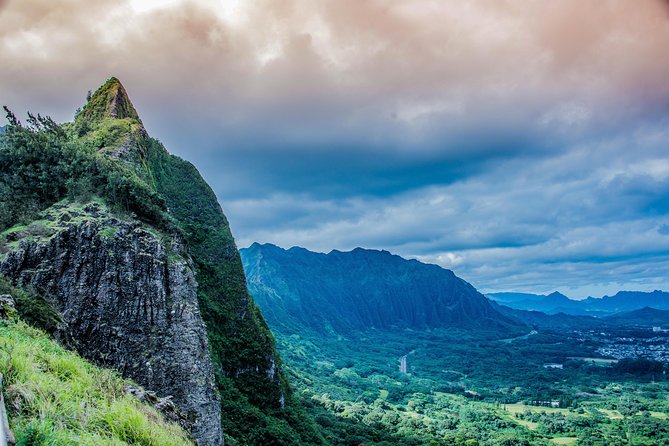
Nuʻuanu Pali Lookout: do your best work in the wind
Next comes Nuʻuanu Pali Lookout, famous for dramatic views of the windward side. It’s also extremely windy, and that affects how long you’ll want to stand still while you shoot.
You’ll have about 20 minutes here with admission included. I’d treat this as your “grab the money shot” moment: bring a lens cloth, hold your phone securely, and prioritize stable angles over perfect setups.
Koolaus Mountains: a quieter stretch with big payoff
Then you head to a local spot by the Koolaus Mountains where you can enjoy the protected mountain range without crowds nearby. You get about 20 minutes, and admission is free for this stop.
This one is great if you want mountain texture and depth without always fighting for space at the popular overlooks. It’s also a strong place to practice foreground-to-background composition, using whatever nature details are closest to you.
Ono Steaks and Shrimp Shack: meal break that still feeds the day
Around mid-tour, you stop at Ono Steaks and Shrimp Shack for about 45 minutes. Admission is listed as free, and since food isn’t included, you should use this time for a plate lunch you’ll actually enjoy, not just a quick snack.
This is also where the day turns from shooting-only to a fuller Hawaii experience: you’ll have time to breathe, talk with your guide, and reset your energy before the coastal hits.
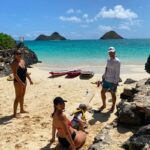
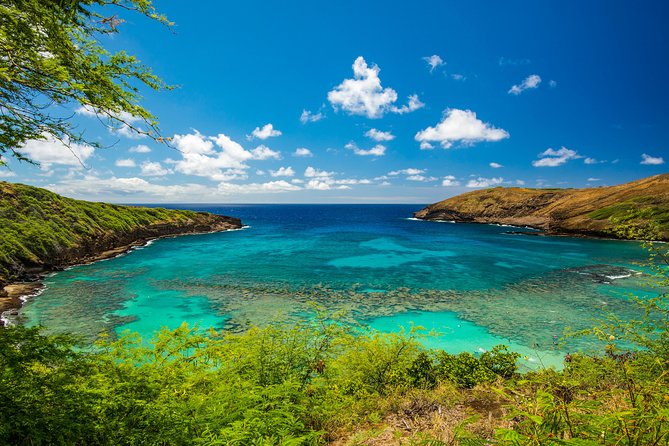
Waimanalo Beach: iconic sand, short time, big mood
Waimanalo Beach is next, and the tour description plays it up for good reason: it’s often ranked among the best beaches in the US. You’ll get about 20 minutes, admission is free, and the guide keeps the vibe respectful—this is a place you’ll want to experience without treating it like a checklist.
Because it’s a beach stop, plan for wind and sun again. For photos, I’d focus on color contrast: skin tones against the sand, bright water against darker rock, and simple horizon lines when you can.
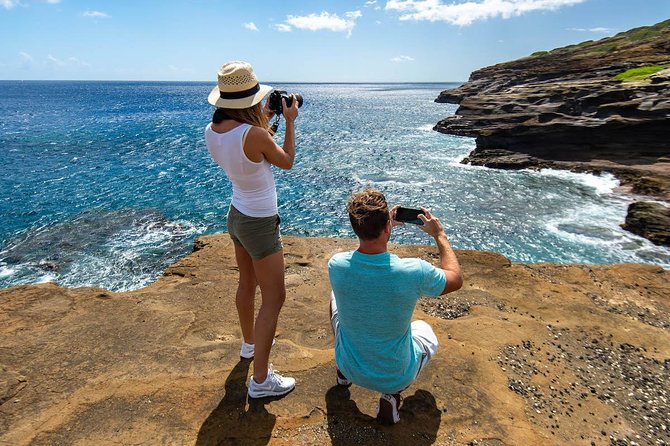
Makapu‘U Point: where color and panoramics meet
At Makapu‘U Point, the pitch is all about the colors and your chance to shoot panoramics. You’ll get about 20 minutes, admission is free, and the guide will help you capture wide views.
This is where panoramic mode or slow panning can pay off, if your phone supports it and your grip is steady. Even if you’re not doing a full panorama, you’ll likely come away with a few wide-angle shots that look way more “Hawaii” than a typical skyline selfie.
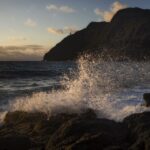
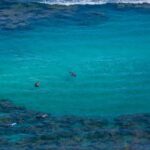
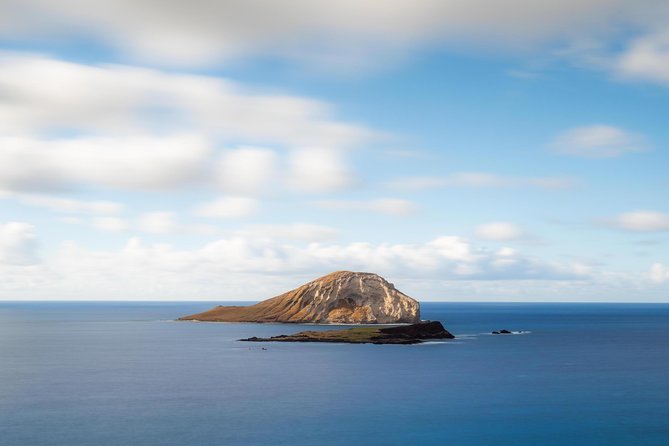
Halona Blowhole: the lava-tube moment and wildlife chances
Then you reach Halona Blowhole, a lava tube spot where ocean water shoots up more than 50 feet. You’ll have about 20 minutes and admission is free, and this stop is also a chance to look for wildlife like whales and turtles.
Weather matters here, and so does timing. If the water is active, you’ll get dramatic spurts; if it’s calmer, you can still shoot texture and clifflines while scanning the waterline from a respectful distance.
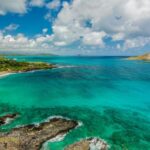
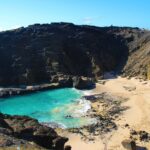
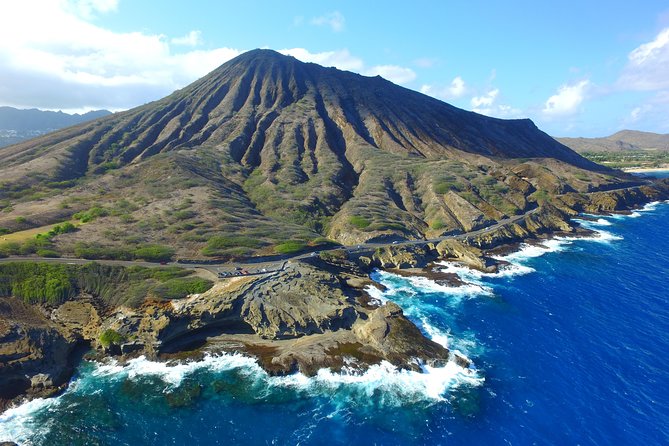
Hawaii Kai Lookout: a panoramic bay finish
You end with Hawaii Kai Lookout, where you’ll capture a panoramic view of the bay. The stop is around 20 minutes, admission is free, and it’s a strong closing shot because it gives you a “wrap the day” perspective.
This is the point where you’ll likely see what your earlier photo practice actually changed. Your angles will look more intentional, and you’ll spend less time fiddling and more time shooting.
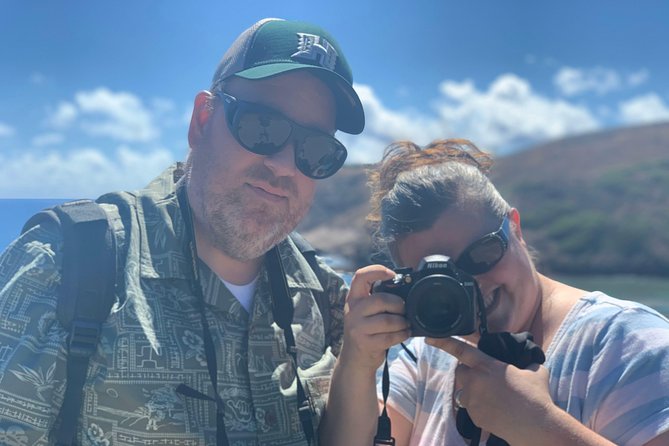
What the photographer guide actually helps you do
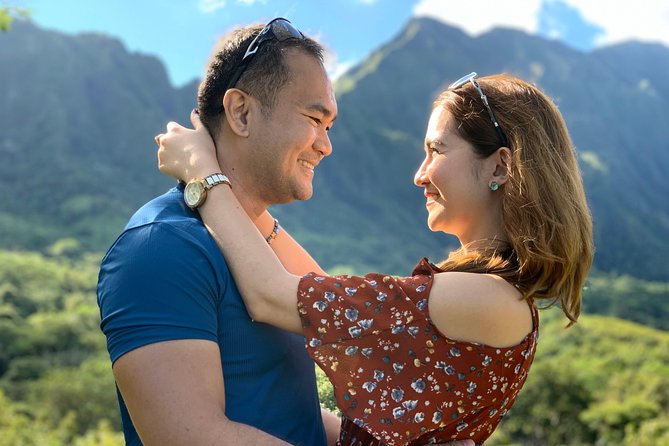
The tour focuses on practical photo improvement, with an emphasis on composition and how to make your shots look like postcards. Guides are praised for helping with phone camera shooting, and several accounts mention guides using a phone camera to take personal photos of the group at stops.
A few guides (names that show up include Kurt, Emily, Chris, and Mac) also take photos of guests and share them later, which is a nice safety net if you struggle with self-timer shots. If you’re traveling as a couple or solo, ask early for how the guide handles portrait-style images at each stop.
The guide factor: the difference between seeing and creating
You’ll likely notice a split between two kinds of tour days: ones where you just get driven around, and ones where the guide helps you actually see. This tour aims for the second, and the repeated praise is about energy, direction, and how comfortable the day feels.
For example, Kurt and Chris get mentioned for enthusiasm and photo coaching, while Andrew and Gabe show up in accounts that highlight how they still find new spots even on repeated Oahu visits. If your guide is Malcolm or Mac, expect a lively vibe and a strong focus on making sure you feel included.
One thing to keep in mind: some viewpoints are loud and exposed, and wind can make it hard to hear every detail. Even with a good guide, it helps to accept that part of the “experience” is sensory chaos, especially at windy lookouts.
What to know before you go: who it fits best
This works well if you want a highlights route without the stress of planning, and you want help turning scenery into photos. It’s especially friendly for solo travelers, couples, and small groups, since the group size stays capped at 7.
It’s also a good match if you have only a day or two on Oahu and you want mountain views plus ocean drama in one run. The stops include a beach, blowhole spectacle, and multiple lookouts, so you won’t feel like you’re stuck doing one type of scenery all day.
You might consider another option if you hate any walking at all, since there is a small amount of walking and some stand-and-shoot time outdoors. Also, this tour is not built for a “food is included” day, so plan your budget accordingly.
Should you book Beautiful Colors of Hawaii Photo Tour?
I’d book it if you want guided photography help with an easy Waikiki start, plus a concentrated hit list of Oahu’s most photogenic viewpoints. The strongest reason to choose it is the combination of small-group attention and practical photo guidance that works with phones, not just fancy cameras.
Skip it if you’d rather drive yourself, spend all day at beaches, or you need the tour to include meals. And if you’re sensitive to pickup logistics, double-check that your hotel is in the select pickup zone.
If you can, book earlier than later. The tour is typically reserved about 46 days in advance, which suggests the best times and guide availability don’t hang around forever.
FAQ
Is pickup available for Waikiki hotels?
Yes, pickup is offered from select hotels in Waikiki. If you want pickup, you should call to confirm your pickup location.
How long is the Beautiful Colors of Hawaii Photo Tour?
It runs for about 5 hours 30 minutes (approx.).
What does the tour cost?
The price is $99.95 per person.
Is food included?
No. Food and drinks are not included, though there is a stop for local food during the tour.
How many people are in the group?
The tour has a maximum of 7 travelers, keeping it small-group.
What should I wear since it runs rain or shine?
It operates rain or shine, so dress appropriately for the weather. Expect some outdoor time at windy viewpoints and plan for a small amount of walking.