REVIEW · CYCLING TOURS
Waikiki Electric Bike Self Guided Tour- Manoa Falls Bike and Hike
Book on Viator →Operated by Hele on Waikiki Electric Bike Rentals · Bookable on Viator
Manoa Falls gets easier with pedal assist. This self-guided e-bike + hike combo takes you from Waikiki up into Manoa Valley, then back down for a simple food win. You’ll use a mobile ticket and follow the route at your own pace.
I really like the way the plan mixes effort and reward: about 5.5 miles of scenic assisted riding sets you up for the Manoa Falls hike without cooking your legs. The walking part is described as user friendly, with lush Native Hawaiian foliage and a calm, quiet feel in the valley.
Here’s the trade-off: this is a self-guided ride and you must be a confident cyclist. One key caution is that routing and intersections can get sketchy if you hit heavier traffic, especially around rush hour, so plan your timing carefully.
In This Review
- Key highlights worth paying attention to
- What You’re Really Doing: E-Bike Up, Then a Short Falls Hike
- Meeting at Hele On Waikiki: Simple Start, Real-Time Planning
- Pedal-Assist Through Manoa Valley: Why This Ride Feels Like a Shortcut
- Stop-by-Stop Breakdown: UH Mānoa, Trail Head, Valley, and the Market
- University of Hawaiʻi at Mānoa Campus (Stop 1)
- Manoa Falls Trail (Stop 2)
- Manoa Valley (Stop 3)
- Manoa Marketplace Farmer’s Market (Stop 4)
- The Manoa Falls Hike: Short, Friendly, and Weather-Dependent
- Bike Parking and That Lock-Up Reality at the Falls
- Timing and Traffic: Avoid the Rush-Hour Headaches
- Food Stop Strategy: Leonard’s Bakery Malasadas on the Way Down
- Price and Value: Is $72.99 Worth It?
- Who Should Book This (and Who Might Be Happier Elsewhere)
- Should You Book This Waikiki-to-Manoa Falls E-Bike Tour?
- FAQ
- Is this tour self guided?
- How long is the e-bike ride and hike?
- Where do I meet for the tour?
- What fitness level do I need?
- What if the weather is bad?
- Can I cancel for free?
Key highlights worth paying attention to
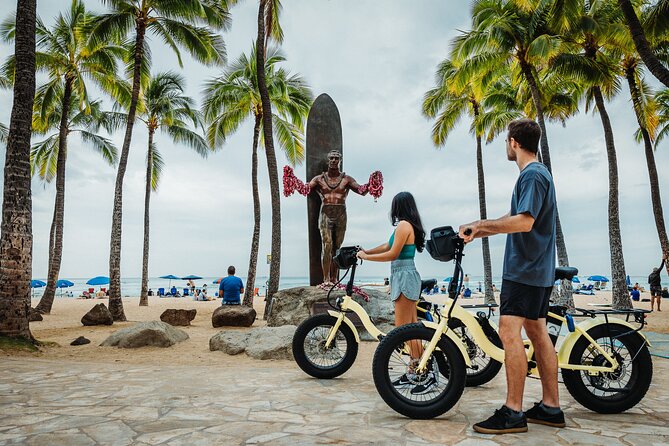
- E-bike first, hike second: about 5.5 miles by bike, then a 1.6-mile hike to the falls
- Self-guided pace: you lock up the bikes and switch from wheels to shoes
- Real scenery stops: UH Manoa, Manoa Valley, and Manoa Marketplace are built into the route
- Traffic can be the problem: heavy traffic and confusing intersection layouts can make the ride stressful
- Lock-up may be tricky at the falls: plan ahead in case there’s limited bike parking
- Leonard’s Bakery malasadas: a classic sweet stop on the way down
What You’re Really Doing: E-Bike Up, Then a Short Falls Hike
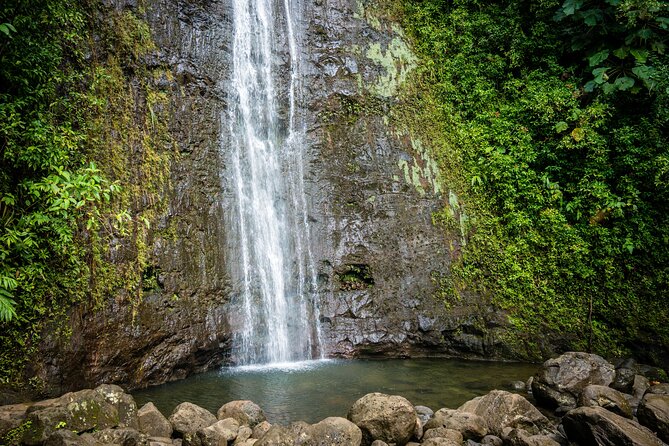
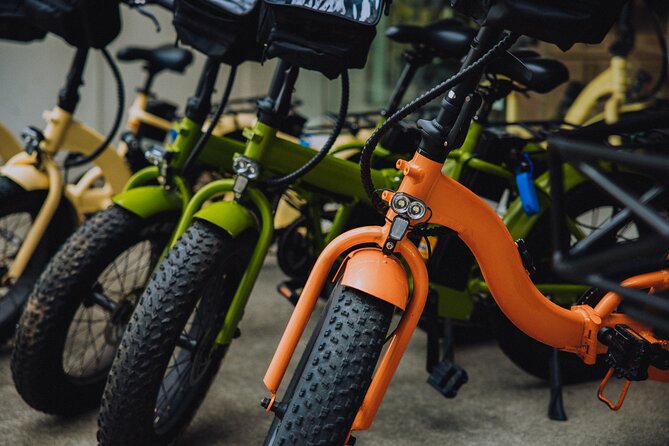
This tour is built around a clear two-part rhythm. First, you ride an electric bike roughly 5.5 miles through Manoa Valley to the Manoa Falls Trail Head. Then you lock up the bike and hike about 1.6 miles to see Manoa Falls.
That split matters for two reasons. One, it keeps the “destination day” from turning into a full-on workout. Two, it gives you the best of both worlds: you get the viewpoint energy of riding up valley roads, then you switch to a slower pace where the greenery and quiet take over.
The hike itself is described as user friendly and framed as a calm trail through lush foliage. You should still have a moderate physical fitness level, because it is still a hike—just not a punishing one.
One more thing: the experience requires a confident bike rider. Since you’re not following a guide who can step in at tricky moments, your comfort with steering, balance, and shared-road situations is a real part of the success equation.
You can also read our reviews of more cycling tours in Oahu


Meeting at Hele On Waikiki: Simple Start, Real-Time Planning
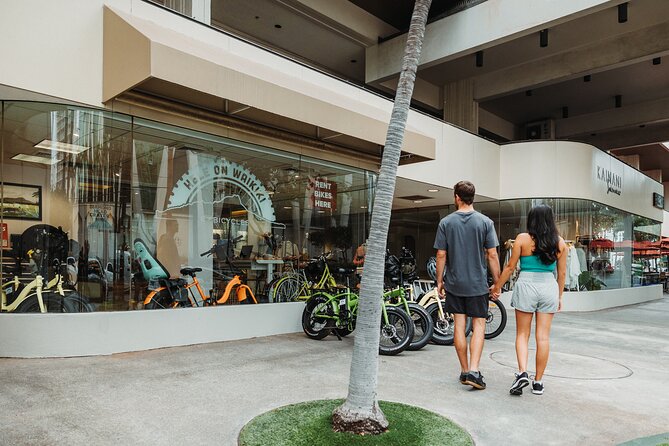
Your starting point is Hele On Waikiki at 2552 Kalākaua Ave, Honolulu, HI 96815. The tour ends back at the same place, so you’re not guessing where the finish line is after your hike.
You’ll have a mobile ticket, and you should receive confirmation at booking. That makes the pre-trip part fairly low friction: you’re not dealing with paper vouchers or a complicated check-in story.
It also notes that the area is near public transportation, which is helpful if you’re mixing your day with other Oahu plans. And since this is labeled as a private tour/activity, it’s set up so only your group participates—good if you want a more personal pace and fewer interruptions.
Still, because it’s self-guided, your biggest “logistics skill” is having your route and timing ready before you start climbing. Don’t leave the phone charging decision for the final minute.
Pedal-Assist Through Manoa Valley: Why This Ride Feels Like a Shortcut
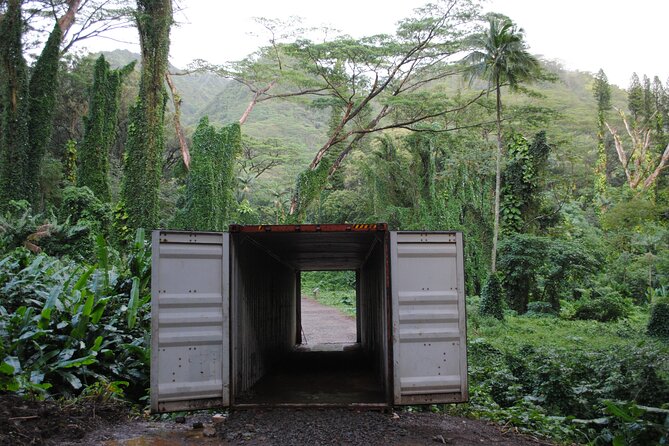
The star value here is not just that you can go up to Manoa Falls—it’s how you get there. The route gives you a scenic ride through the valley first, so you’re already surrounded by greenery before you even start hiking.
You’ll pass through key stops along the way, starting with the University of Hawaiʻi at Mānoa area. That matters because it anchors your day in a real neighborhood setting, not a remote trailhead you reach once and forget. Then the route continues through Mānoa Valley, where the focus shifts to the quieter, more nature-centered part of the experience.
On the practical side, an e-bike also changes what you notice. Instead of thinking about every uphill move, you can watch the road layout, scan for places to pause, and soak in the valley feel as you roll forward. For many people, that’s the difference between rushing and actually enjoying the day.
Stop-by-Stop Breakdown: UH Mānoa, Trail Head, Valley, and the Market
Let’s break down what each built-in stop means for your day, and what to watch for.
University of Hawaiʻi at Mānoa Campus (Stop 1)
This is where you begin the ride portion. Starting near UH puts you on familiar turf in Honolulu, which can make it easier to orient yourself if you’re already exploring around Waikiki and central Honolulu.
Even if you don’t plan to linger, this stop is useful as a “warm-up zone” before you’re thinking about Manoa Valley traffic and the ride to the trail head.
You can also read our reviews of more guided tours in Oahu





Manoa Falls Trail (Stop 2)
This is the transition point: you reach the Manoa Falls Trail Head area, then you lock up the bikes and hike to the falls. In other words, stop 2 is where your day changes from moving-by-bike to moving-on-foot.
This is also where you should be alert to practical details, especially bike lock-up. One rider reported trouble finding a bike rack at the falls area, and also ran into a guy asking for $3 each to access the parking lot. I’d treat that as a “plan for surprises” moment, not a guarantee—but it’s worth taking seriously.
Manoa Valley (Stop 3)
This stop is about the feel of the ride. You’re in a valley environment with lots of Native Hawaiian foliage, and the experience description points to a peaceful energy here.
This is where the e-bike tends to shine. The assisted riding makes it easier to stay relaxed and enjoy the scenery, rather than burning time and energy just trying to keep pace.
Manoa Marketplace Farmer’s Market (Stop 4)
This is a food and browsing stop. If you time it right, it can be a simple way to turn the return leg into more than just getting back to Waikiki.
Since the only detail provided is that it’s a farmer’s market stop, I won’t pretend I know what specific stalls or schedule you’ll find. But as a general strategy, treat it like a place to pause, refuel, and grab something easy without derailing your ride/hike plan.
The Manoa Falls Hike: Short, Friendly, and Weather-Dependent
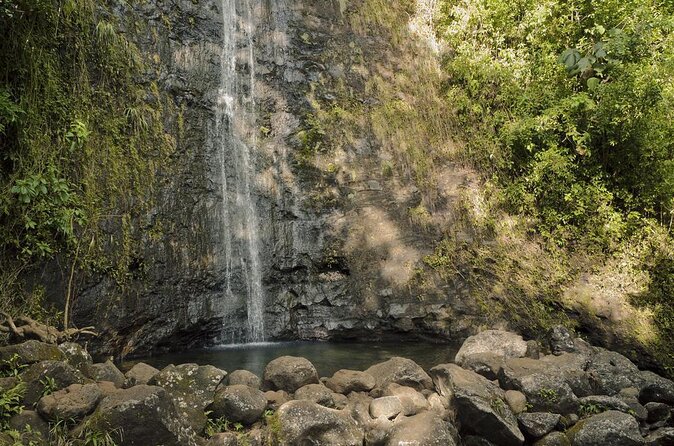
The hike is described as about 1.6 miles and user friendly, which is a great fit for a half-day plan. Expect a trail experience through lush areas rather than a climb that demands serious training.
That said, the falls themselves can be mood-dependent. One rider reported that when they visited, the waterfall was only a trickle. If your main goal is dramatic waterfall flow, consider checking recent conditions on the day of your visit—especially after long dry stretches.
Also, plan your posture for the switch from bike to hike. Locking up the bike is part of the trail rhythm, and if bike parking turns out limited, you may need to adjust how you handle your gear and where you stop for a moment before hiking.
Bike Parking and That Lock-Up Reality at the Falls
This part is where I’d be most cautious about expectations. The plan is straightforward: ride to the trail head, lock the bikes, hike. But real life can be less tidy.
In one reported case, a rider couldn’t find a bike rack at the falls and was asked to pay $3 each to enter the parking lot. That could vary by day, by access rules, or even by who’s managing the area, but it highlights the core point: don’t assume your bike will have a guaranteed, easy-to-find rack.
So I’d come prepared with:
- A good bike lock mindset (you’ll need to secure the bike)
- A bit of flexibility in timing if the first lock-up spot you find isn’t ideal
- Small cash, just in case a quick access request pops up near the area
This is still a good experience—but it’s the type of good that benefits from planning, not from wishful thinking.
Timing and Traffic: Avoid the Rush-Hour Headaches

The biggest negative feedback is about traffic and route safety. One rider said the GPS led them onto heavier traffic, and they felt it was not very safe. They also noted bike lanes that were confusing when the route entered intersections with angled streets. Their tip: don’t do this near rush hour.
That advice is worth taking as a real strategy. If you want this to feel like a peaceful valley day, timing matters as much as the route itself.
Here’s how to apply the takeaway:
- Aim to start earlier rather than later so you can avoid the densest roads
- Treat intersections like the most important moment of the trip—slow down, confirm where you’re going, and don’t “guess” through complex street geometry
- If your route feels wrong or too busy, adjust rather than pushing through traffic for the sake of sticking to a plan
When one rider returned at about 5 pm, they described heavy traffic again. That suggests the afternoon can be a tough time for this ride, so build your day to dodge that.
Food Stop Strategy: Leonard’s Bakery Malasadas on the Way Down
The route includes a stop at Leonard’s Bakery on the way down, with the recommendation to grab their world famous Hawaiian malasadas.
Even if you don’t make it to a market stop earlier, this is a clear, satisfying reward at the end of the hike. Since it’s positioned on the way down, it also supports the half-day pacing: you burn effort up top, then you cool off and celebrate on the return.
This is one of those “simple, high reward” additions that makes the day feel like more than just commuting to a trail.
Price and Value: Is $72.99 Worth It?
At $72.99 per person for about 4 hours, you’re paying for a few things at once: an electric bike experience, a ready-to-follow self-guided plan, and access to a hike that’s short enough to fit into a half-day.
For value, the deciding factor is your comfort level:
- If you’re a confident bike rider and you time it well (avoiding heavy traffic), you’ll feel like you’re getting a lot done without losing your whole day to travel.
- If you’re not comfortable on roads with intersections, you may end up stressed, which makes the whole trip feel like less of a win—even if the scenery is great.
Also note the booking window: it’s commonly booked about 21 days in advance on average. That’s a signal that people plan this as a “main activity,” not a backup plan. If you want your preferred day, give yourself time.
Who Should Book This (and Who Might Be Happier Elsewhere)
This tour is best for you if:
- You can ride confidently and stay calm at intersections
- You want a self-guided day with flexibility
- You’re looking for a nature break without a long, exhausting hike
- You like the idea of pairing an e-bike ride with a short, approachable trail
You may want to skip it if:
- You’re a newer or shaky bike rider (the experience explicitly requires confidence)
- You’re sensitive to traffic stress or road complexity
- You’re hoping for a fully guided, step-by-step handholding experience
Because it’s private for your group, it also works nicely for friend groups who don’t want to share the route plan with strangers.
Should You Book This Waikiki-to-Manoa Falls E-Bike Tour?
I’d book it if you match the core requirements: confident biking, moderate fitness, and a willingness to ride strategically around timing. The payoff is a scenic valley ride plus a hike that doesn’t demand an all-day commitment, and it’s set up with food value built in through Leonard’s Bakery.
I would not book it if you know you hate busy intersections or you’re planning to ride during peak traffic hours. For this specific route style, timing is part of the safety plan.
If you’re unsure, treat this like a “great day with one key condition” activity: start early, stay alert at crossings, and plan for the possibility that bike lock-up at the falls might be harder than you’d expect.
FAQ
Is this tour self guided?
Yes. This is a self-guided experience, and you must be a confident bike rider.
How long is the e-bike ride and hike?
The e-bike ride is about 5.5 miles, and the hike to Manoa Falls is about 1.6 miles. The total tour time is about 4 hours.
Where do I meet for the tour?
The meeting point is Hele On Waikiki at 2552 Kalākaua Ave, Honolulu, HI 96815. The activity ends back at the same meeting point.
What fitness level do I need?
The description says you should have a moderate physical fitness level.
What if the weather is bad?
This experience requires good weather. If it’s canceled due to poor weather, you’ll be offered a different date or a full refund.
Can I cancel for free?
Yes. You can cancel up to 24 hours in advance for a full refund. If you cancel less than 24 hours before the start time, the amount you paid will not be refunded.